How to Sharpen Loppers With a File
Dull loppers don't just make pruning harder, they make it messier. Crushed stems and torn bark are open invitations for disease, and no amount of effort at the handle end fixes a blunt blade. Knowing how to sharpen loppers with a file is one of those practical skills that takes twenty minutes to learn and saves you money every single season.
Most quality bypass loppers are ground to a bevel angle of around 20 to 25 degrees at the factory, and that's the angle you're trying to restore, not reinvent. As of 2026, a decent mill bastard file costs between $4 and $12, which makes this one of the best-value maintenance jobs in the garden. Let's start by making sure you understand exactly what you're working with.
Why Dull Loppers Are Worth Fixing (Not Replacing)
A sharp lopper blade slices cleanly through a stem in one motion. A dull blade crushes and tears, and your hands pay for it through extra squeezing force on every cut.
Beyond comfort, there's a real plant health argument here. Clean cuts heal faster and give fungal spores and bacteria far less surface area to exploit. The Royal Horticultural Society consistently recommends clean, sharp cuts as a basic principle of good pruning practice, and that starts with the tool.
Replacement blades, where they're even available, often cost £15 to £40. A brand new pair of quality loppers runs £30 to £150 or more. A file and fifteen minutes of your time is a genuinely better answer for a blade that's simply lost its edge rather than cracked or chipped past recovery.
Bypass vs. Anvil Loppers: Know Which One You Have Before You Start
This matters more than most guides admit. The sharpening technique for bypass loppers and anvil loppers is different enough that using the wrong method on either type will make things worse, not better.
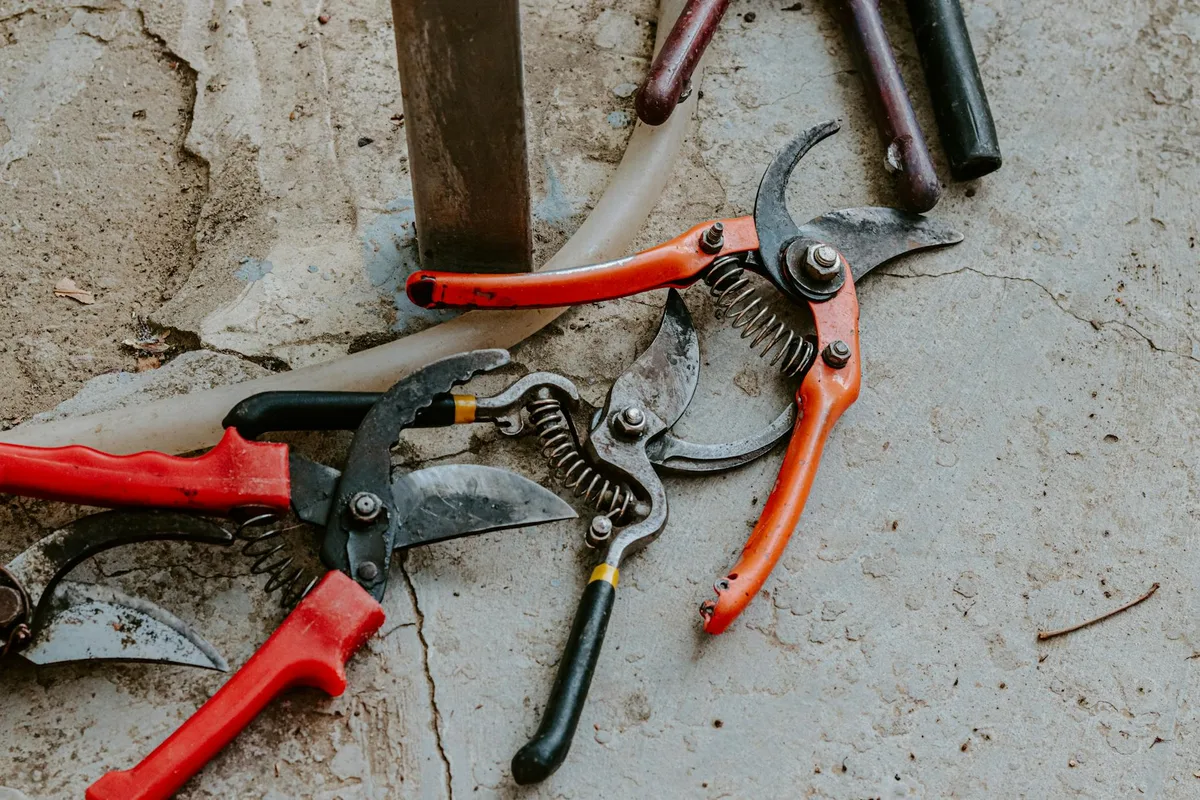
Bypass loppers work like scissors. Two blades pass each other, with one sharp cutting blade doing the slicing work and one flat counter blade acting as a support. Only the cutting blade gets sharpened. It has a single bevel on the outer face, and that's the only side you file.
Anvil loppers work differently. A single sharpened blade closes down onto a flat, soft metal or plastic anvil bar. The blade itself is typically sharpened on both sides (a double bevel, like a knife), so you file both faces to keep the edge centered. Filing only one side on an anvil blade pulls the edge off-center and makes cutting worse.
Here's a quick way to tell them apart:
| Feature | Bypass Loppers | Anvil Loppers |
|---|---|---|
| Blade count | Two blades that cross | One blade, one flat bar |
| Cut type | Scissor action | Crushing/splitting action |
| Bevel type | Single bevel (one side) | Double bevel (both sides) |
| Best for | Live wood, green stems | Dry or dead wood |
| Sharpening side | Cutting blade only | Both sides of cutting blade |
If you've got ratchet loppers, check whether the cutting head is bypass or anvil style. The ratchet mechanism is in the handle, and the blade geometry still follows the same rules above.
What You Need: Choosing the Right File for the Job
You don't need a lot of equipment. What you do need is the right file, because the wrong one either removes too much metal too fast or barely touches the blade at all.

Mill Bastard File vs. Diamond File
A mill bastard file is the traditional choice and the one most sharpening guides point to for garden tools. "Bastard cut" refers to the coarseness of the teeth, sitting between a rough cut and a second cut. It removes metal efficiently without being so aggressive that you lose control of the bevel angle. For loppers that are genuinely dull or slightly neglected, this is the right starting point.
A diamond file (a paddle or rod coated with industrial diamond grit) is faster on harder steels and stays flat longer than a traditional file. It's worth having if your loppers are made from high-carbon Japanese steel or if you want a finer edge after the initial mill bastard pass. Diamond files run $10 to $25 depending on size and grit.
For most home gardeners with standard carbon steel or hardened steel bypass loppers, a single 8-inch mill bastard file handles everything.
File Size and Cut Grade
- 8-inch mill bastard file: best all-around size for most lopper blades
- 6-inch file: useful for smaller blades or tighter working angles
- Second cut file: use this for a final smoothing pass once the edge is established
- Diamond paddle file, medium grit: good follow-up tool on harder steels
One thing worth knowing: files only cut on the push stroke (away from your body). Dragging a file backward on the return stroke doesn't sharpen anything and wears the teeth faster. This matters when we get into technique.
How to Read Your Lopper Blade (Finding the Bevel)
Before any file touches the blade, you need to find the bevel. Getting this wrong is the single most common mistake, and it's why some people sharpen their loppers and end up with a blade that's actually worse than before.
Single Bevel Bypass Blades
Hold the open lopper up to a light source and look at the cutting blade edge-on. You'll see that one face is flat (the inner face, the side that faces the counter blade) and the other face tapers down to the edge at an angle. That tapered surface is the bevel, and it's the only surface you file.
The flat face never gets filed as part of sharpening. You only touch the flat face briefly at the very end to remove the burr, and that's one or two light passes at most.
A visual cue that helps: the bevel face often has a slightly lighter, shinier strip along the edge compared to the rest of the blade, especially on a used lopper. That's where the original factory grind ended. You're restoring that line.
Anvil Blade Geometry
On an anvil lopper, both faces taper to a center edge, much like a kitchen knife. When you hold it edge-on, the blade looks like a very shallow triangle. Both faces are beveled, and both faces need filing to keep the edge centered. If one side is filed more than the other, the blade tracks off to one side on the anvil and cuts poorly.
Setting Up Safely Before You Touch the File
Sharpening a lopper freehand is a bad idea. The blade will shift, your file angle will change with every stroke, and a slipping tool near a sharp edge is a quick way to get cut.
The safest setup is a bench vice. Open the lopper, clamp one handle firmly in the vice so the cutting blade is accessible and at a comfortable working height, and make sure the blade isn't going anywhere. If you don't have a vice, brace the lopper against a solid workbench edge and hold one handle flat against the bench surface with your non-dominant hand, well away from the blade.
A few things to have ready before you start:
- Wire brush or coarse steel wool (for cleaning rust and sap off the blade)
- Clean rag
- Your file
- Cut-resistant gloves (wear these throughout)
- Eye protection if the blade has heavy rust or scale
- Camellia oil, 3-in-1 oil, or linseed oil for the finish
Clean the blade before you file it. Sap and rust gum up file teeth fast and give you a false sense of where the edge actually is. A quick scrub with a wire brush and a wipe-down takes two minutes and makes a real difference to how cleanly the file bites.
How to Sharpen Bypass Loppers with a File: Step by Step
With your loppers cleaned, secured, and your file in hand, here's the full process from start to finish.
Step 1: Clean the Blade First
If you haven't already, scrub off any sap residue or surface rust with a wire brush. Sap is sticky enough to clog file teeth within a few strokes, which kills efficiency and gives you a misleading sense of how much metal you're actually removing.
Step 2: Lock the Loppers Securely
Clamp one handle in a bench vice with the cutting blade facing upward and the bevel side accessible. The blade should be at roughly chest height when you're standing, so your filing stroke stays controlled and level. If you're using a workbench edge instead of a vice, press the lower handle flat against the bench surface and keep your non-dominant hand well back from the blade.
Step 3: Match the Bevel Angle (20 to 25 Degrees)
Lay your file flat against the bevel face. You'll feel it sit flush when it matches the existing grind angle. That flush, flat contact is exactly what you want to maintain throughout every stroke. If you lift the file handle too high, you'll create a second steeper bevel above the original, which weakens the edge.
If you drop it too low, you'll start filing the flat face by accident.
A useful visual reference: at 20 to 25 degrees, the file handle sits roughly two finger-widths above the flat of the blade. It's a shallow angle, shallower than most people's instincts, so take a second to confirm the contact before you start moving.
Step 4: File the Cutting Blade Using Push Strokes
Push the file along the bevel, moving away from your body, in smooth even strokes that follow the curve of the blade from heel to tip. Apply light to moderate pressure on the push stroke. Lift the file clear on the return. Don't drag it back across the edge.
Work in passes of five to eight strokes, then stop and check your progress. You're looking for a consistent scratch pattern across the full width of the bevel, which tells you the file is making even contact. If only the top or bottom of the bevel is scratched, adjust your angle slightly.
For curved blades (which most quality loppers have), you'll need to sweep the file slightly as you push, following the arc of the edge rather than dragging it in a straight line. Think of it as tracing the curve, not cutting across it.
Step 5: Check for a Burr on the Flat Face
After ten to fifteen strokes, run your thumb lightly across the flat face of the blade, moving from the body of the blade toward the edge. Don't run your thumb along the edge. You're feeling across it.
A burr is a tiny curl of metal that the filing action has pushed over to the flat side. When you feel a consistent, faint roughness along the full length of the edge on the flat face, you've raised a burr. That's your confirmation that you've filed all the way to the edge and the sharpening has worked. No burr means you haven't reached the edge yet, so keep filing.
Step 6: Deburr the Flat Face
Lay the file completely flat against the flat face of the blade (zero angle, fully flush) and make one or two very light passes along the full length. You're not sharpening here, you're just knocking off that curled burr. One or two passes is enough. If you file more than that, you risk rounding the edge on the flat side and undoing your work.
Some sharpeners prefer a fine sharpening stone for this step rather than the file, which gives a cleaner, flatter result on the deburr pass. Either works fine on standard carbon or hardened steel blades.
Step 7: Test the Edge
Run your thumbnail lightly across the edge at a 90-degree angle. A sharp edge bites into the nail and catches slightly. A dull edge slides straight off. Alternatively, take the loppers to a green stem or piece of softwood and make a single cut.
A properly sharpened bypass lopper should slice cleanly with noticeably less effort than before.
How to Sharpen Anvil Loppers with a File: What's Different
The process for anvil loppers follows the same basic mechanics, but with two key differences worth getting clear before you start.
First, you file both beveled faces of the cutting blade, not just one. Work one side for five to eight strokes, then switch to the other side and match the stroke count. Keeping both sides even maintains a centered edge, which is what lets the blade track straight down onto the anvil bar cleanly.
Second, the bevel angle on anvil blades is often slightly more acute than on bypass blades, sometimes as shallow as 15 to 20 degrees, since anvil loppers are typically designed for dry or dead wood where a more aggressive cutting geometry helps. Check the blade visually and match whatever angle is already there rather than assuming a standard number.
Don't file the anvil bar itself. The bar is soft metal or plastic and wears intentionally. If it's badly grooved or damaged, replacement anvil bars are usually available from the manufacturer and cost very little.
Visual Cues That Tell You It's Working (And When to Stop)
Sharpening by feel and visual feedback is more reliable than counting strokes. Here's what to look for at each stage.
You're on track when:
- The scratch pattern from the file covers the full width of the bevel evenly
- A consistent burr forms along the full length of the edge on the flat face
- The edge line looks clean and unbroken when you hold it up to light
- A test cut on green wood is noticeably cleaner and easier
Stop and reassess when:
- The scratch pattern is only appearing on one part of the bevel (your angle is drifting)
- You've done 30-plus strokes with no burr forming (the file may be worn out, or you're not reaching the edge)
- The edge line looks wavy or double (two bevel angles are competing)
Stop altogether when:
- You've raised a burr, completed the deburr pass, and the test cut is clean
- Filing more at this point only removes metal without improving the edge
The most common over-sharpening mistake is continuing past the point where a clean burr has formed and been removed. More strokes don't mean a sharper edge once the geometry is correct.
Mistakes That Ruin the Blade
Most sharpening errors come down to angle control and knowing which surface to file. These are the ones that cause real, lasting damage.
Filing the Wrong Side
Filing the flat face of a bypass lopper as if it were the bevel is probably the single most common mistake. The flat face looks like a natural surface to file because it faces you when the lopper is open, but filing it rounds the edge from the wrong side and makes the blade worse. Always confirm which face carries the bevel before your first stroke.
Getting the Angle Wrong
Filing too steeply (handle too high) creates a secondary bevel above the primary one. The edge looks sharp up close but rolls over quickly in use because there's not enough steel supporting it. Filing too shallowly removes metal from the body of the blade rather than the edge zone. Both errors waste effort and shorten blade life.
If you suspect you've got the angle wrong, hold the blade up to a raking light source. Two distinct shiny bands at different angles on the bevel face confirm a double bevel. You'll need to file back to the lower angle consistently until the upper band disappears.
Over-Filing and Thinning the Blade
Manufacturer specs on quality loppers from brands like Felco and Bahco are designed around a specific blade thickness for strength and flex. Filing aggressively and repeatedly over multiple seasons can thin the blade past the safe working profile. If the blade is noticeably thinner at the tip than at the heel, or if it flexes when you apply lateral pressure, it's been over-filed and should be replaced.
Skipping the Deburr Pass
A burr left on the flat face creates a ragged, inconsistent edge that tears rather than cuts. The cut might feel slightly better than before, but it won't be clean. The deburr step takes thirty seconds and makes a real difference to the quality of the finished edge. Don't skip it.
After Sharpening: Oil, Adjust, and Store Correctly
Once the edge is sharp and the burr is gone, wipe the blade clean with a dry rag to remove any metal filings. Then apply a thin coat of camellia oil, 3-in-1 oil, or food-grade mineral oil to both blade surfaces. This prevents rust forming on the freshly exposed steel, which is particularly vulnerable right after filing.
Check the pivot bolt tension before you put the loppers away. The two blades on bypass loppers should pass each other with light, consistent pressure. Too loose and the blades flex apart mid-cut, causing tearing. Too tight and the cutting action becomes stiff and inefficient.
Adjust with a spanner until the blades track smoothly with no lateral wobble.
Store loppers with the blades lightly oiled and the handles open slightly, so the spring mechanism isn't under constant compression. A dry shed or garage is fine. Hanging them on a hook rather than throwing them in a bucket with other tools keeps the edge protected between uses.
How Often Should You Sharpen Loppers?
For regular home garden use, two to three sharpenings per season is a reasonable target. That typically means once before spring pruning begins, once mid-season if you're doing heavy work, and a clean-up pass before storing for winter.
The honest answer, though, is that frequency depends entirely on what you're cutting and how much of it. Loppers used weekly on green shrub stems through a full growing season will need more frequent attention than a pair brought out twice a year for fruit tree pruning.
A few signs that tell you it's time, regardless of the calendar:
- Cuts require noticeably more squeezing force than they used to
- Stems are being crushed or bent before they sever
- Cut ends on woody stems look torn or fibrous rather than clean
- The lopper "chews" through softer green growth instead of slicing it
If you're pruning diseased wood, sharpen and disinfect the blade before moving to healthy plants, not just at the end of the session. A 70% isopropyl alcohol wipe between cuts is the standard recommendation for preventing the spread of fungal and bacterial pathogens through pruning tools.
When a File Isn't Enough: Rust, Damage, and Blade Replacement
A file handles dullness well. It doesn't handle everything.
What a file can't fix
Deep pitting from rust is the most common case where file sharpening hits its limit. Surface rust that sits on top of the steel wire-brushes off and leaves a usable surface underneath. Rust that has pitted into the blade face, however, leaves craters that no amount of filing will smooth out, because you'd need to remove so much metal to get below the pits that you'd destroy the blade geometry entirely.
Chipped or notched edges are another clear boundary. A small nick can sometimes be filed out by working back from each side of the chip until the edge is continuous again, but this removes a meaningful amount of steel and shortens the blade. A large chip, or multiple chips along the edge, means the blade has taken impact damage beyond what routine sharpening should address.
Signs the blade needs replacing, not sharpening
- Visible cracks running from the edge into the body of the blade
- Chips deeper than roughly 2mm that would require heavy metal removal to resolve
- Blade warped or bent out of alignment at the pivot
- Steel that the file slides over without biting (a sign the blade has been work-hardened or heat-damaged, possibly from a bench grinder used incorrectly in the past)
- Bypass blades that no longer track parallel, causing the blades to cross unevenly
Replacement blade availability
Felco, Bahco, and ARS all offer replacement blades for most of their lopper models, which is one strong argument for buying quality tools in the first place. Replacement blades typically run £15 to £35, which is far cheaper than a new tool. Budget loppers from unbranded manufacturers rarely have spare parts available, so a damaged blade usually means a new pair.
If replacement blades aren't available and the loppers themselves are structurally sound, a professional tool sharpening service can sometimes regrind a damaged edge on a bench grinder with proper cooling, restoring geometry that a hand file can't reach. Expect to pay £5 to £15 for a professional sharpen depending on your area.
FAQs
Can you sharpen loppers with a regular flat file?
Yes, a standard flat file works fine as long as it's the right cut grade. A mill bastard file (medium coarseness) is the most practical choice for most lopper blades. A smooth-cut flat file is too fine for a genuinely dull blade and will take a very long time to make progress. A rough-cut file removes metal too aggressively and makes angle control harder.
If you've only got one file in the shed, a medium-cut flat file is a workable substitute.
Do you sharpen both blades on bypass loppers?
No. On bypass loppers, only the cutting blade gets sharpened. The counter blade (the flat, unsharpened blade that acts as a support) should not be filed. Filing the counter blade changes its geometry and can cause the blades to bind or separate during cutting.
The only time the flat face of the cutting blade gets any file contact is the single light deburr pass at the very end.
What angle should loppers be sharpened at?
Most bypass loppers are factory-ground between 20 and 25 degrees. Rather than measuring this precisely, the practical approach is to match the existing bevel angle by laying your file flush against the bevel face before you start. That flush contact tells you you're at the correct angle. Changing the factory angle significantly, either steeper or shallower, weakens the edge or reduces its cutting efficiency, so sticking with what's already there is the right call.
How do you know when loppers are sharp enough?
Two quick checks work well. First, the thumbnail test: draw the edge across your thumbnail at 90 degrees. A sharp edge catches and bites slightly. A dull one slides off.
Second, a test cut on green wood: a properly sharpened lopper slices a 1/2-inch green stem cleanly with one smooth motion and noticeably less hand effort than before sharpening. If the cut still tears or requires multiple squeezes, either the edge needs more work or the blade alignment needs checking.
Can you over-sharpen loppers?
You can't make loppers too sharp, but you can remove too much metal through repeated unnecessary sharpening. Each time you file, you're removing steel and very slightly shortening the blade's usable life. The goal is to sharpen when the edge actually needs it, not on a rigid calendar schedule. If the tool is cutting well, leave it alone.
Over time, excessive filing thins the blade and can compromise its structural integrity, particularly on thinner bypass blades.
Why do my loppers still cut badly after sharpening?
A sharp edge doesn't fix a misaligned blade. If the bypass blades aren't tracking parallel, or if the pivot bolt tension is wrong, the cutting action will still feel off regardless of edge sharpness. Check that the blades cross each other smoothly with no gap opening up mid-cut. Check that the pivot bolt isn't so loose the blades flex laterally.
Also confirm you sharpened the correct face of the cutting blade. Filing the flat face instead of the bevel is the most common reason a freshly "sharpened" lopper still performs poorly.