How to Sharpen Fiskars Loppers
If you've noticed your loppers tearing through stems instead of slicing cleanly, knowing how to sharpen Fiskars loppers is the most useful skill you can pick up this season. A dull blade doesn't just make the work harder. It damages plant tissue, leaving ragged cuts that invite disease.
Fiskars manufactures two distinct lopper types, bypass and anvil, and each one requires a completely different sharpening approach. Manufacturer specifications confirm that bypass blades carry a single bevel at roughly 20 to 30 degrees, while anvil blades are ground on both sides. Get those confused and you'll make the blade worse, not better. Here's exactly what to do with each.
Why Your Fiskars Loppers Are Crushing Instead of Cutting
Crushing is almost always a dullness problem, not a strength problem. When the cutting edge loses its geometry, instead of wedging through a stem cleanly, the blade compresses plant tissue before it can sever it. You end up with a bruised, ragged wound on the branch rather than a clean cut.
Aggregate user reviews of Fiskars loppers, as of 2026, consistently report two triggers for this: a blade that hasn't been sharpened in a full growing season, and a blade that was sharpened on the wrong side. Both produce the same crushing symptom, but they need different fixes.
A third cause worth checking first is pivot bolt tension. If the blades are too loose, they flex apart mid-cut and pinch rather than shear. Snug the pivot bolt before you assume the edge is the problem.
Bypass vs. Anvil Loppers: Sharpening Is Not the Same for Both
This is the most critical thing to understand before you pick up a file.
Bypass loppers work like scissors. One blade (the cutting blade) has a single beveled edge. The other blade (the counter blade) is flat on both sides and acts as a guide. You sharpen only the beveled face of the cutting blade.
Touch the flat counter blade with a file and you've ruined the blade's ability to close cleanly.
Anvil loppers work differently. The single cutting blade comes down onto a flat anvil jaw. That cutting blade is ground on both sides, forming a double bevel like a knife. Both faces need to be filed evenly, otherwise the edge migrates off-center and the blade starts splitting stems rather than slicing them.
Here's a quick reference before you do anything else:
| Feature | Bypass Loppers | Anvil Loppers |
|---|---|---|
| Blade count | Two blades (cutting + counter) | One blade + flat anvil jaw |
| Bevel type | Single bevel (one side only) | Double bevel (both sides) |
| Sharpening side | Cutting blade bevel side only | Both sides of the cutting blade |
| Best for | Live green wood, precision cuts | Dead wood, dry woody stems |
| Risk if sharpened wrong | Counter blade damaged, gap created | Edge off-center, splitting cuts |
If you're not sure which type you have, look at the cutting blade head-on. A single angled face going to a flat back means bypass. A symmetrical point, like a roof ridge, means anvil.
What You Need Before You Start
Choosing the Right Sharpening Tool
You don't need much, but what you use matters.
- Mill bastard file (flat file): The most reliable all-round choice for bypass lopper blades. Coarse enough to remove metal efficiently, controllable enough to follow the bevel angle. A 6-inch or 8-inch flat file works well on most Fiskars lopper blades.
- Diamond file or diamond sharpening rod: Faster cutting on hardened steel. Fiskars uses hardened steel blades in the Rockwell 55 to 60 HRC range, so a diamond file cuts them efficiently without clogging. Good for touch-up work between seasons.
- Fiskars garden tool sharpener: Fiskars produces a dedicated pull-through sharpener with carbide edges designed for their own tools. It's a convenient single-pass option for quick maintenance, though it removes more metal per stroke than a file, so it's not ideal for blades that are already thin.
- Flat whetstone: Useful for the deburring step on the flat side of a bypass blade. A coarse-to-medium grit stone works fine here.
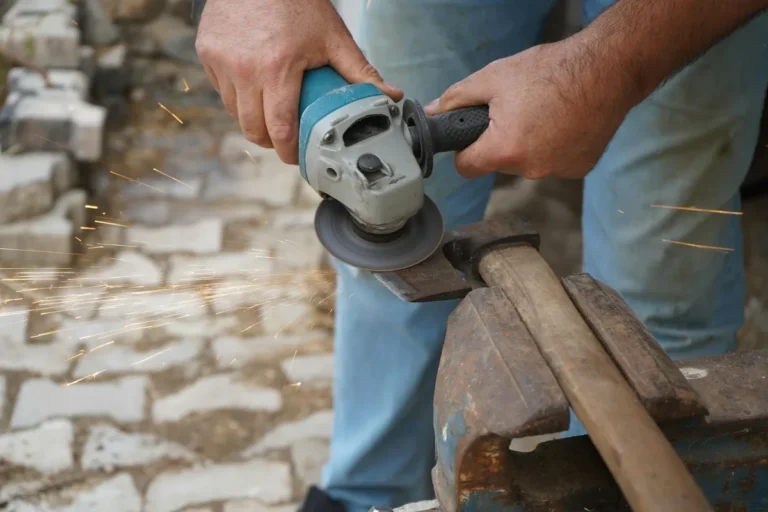
Avoid angle grinders and bench grinders on lopper blades. Fiskars' FrictionFree non-stick coating can be stripped by rotary tools, and the heat generated can draw the blade's temper, meaning the steel softens and won't hold an edge.
What to Look For on the Blade Before You Touch It
Take two minutes to inspect the blade in good light before you start filing.
- Identify the bevel: On a bypass blade, hold the cutting blade flat and tilt it. One face angles up to the edge. That's the bevel side. The other face is flat. Sharpen only the bevel side.
- Check for chips and nicks: Small nicks are fixable with a file. A large chip (more than 2mm deep) means significant metal removal is needed. At that point, a replacement blade often makes more sense.
- Check the FrictionFree coating: The grey-to-black non-stick coating on Fiskars blades is thin. If it's already worn through near the edge, sharpen carefully in that zone to avoid unnecessary metal loss.
- Check for rust: Surface rust needs to come off before sharpening. It clogs the file and obscures the true edge. A light scrub with steel wool or a rust eraser sorts it out.
How to Sharpen Fiskars Bypass Loppers: Step by Step
Step 1: Clean the Blade and Remove Rust
Wipe both blades down with a rag dampened with a little mineral spirits or rubbing alcohol. This removes sap, plant resin, and surface grime. If there's rust, use steel wool or a rust eraser and work along the blade length. Don't skip this.
Filing over a dirty or rusty surface gives you a rough, uneven edge and ruins your file faster.
Step 2: Identify the Bevel Side
Hold the lopper cutting blade up to light at eye level. The bevel side catches the light along an angled face leading to the edge. The flat side sits dead flat. You'll file only that angled face.
If you're still unsure, run your fingernail gently across both faces near the edge. The bevel side has a distinct ramp. The flat side has none.
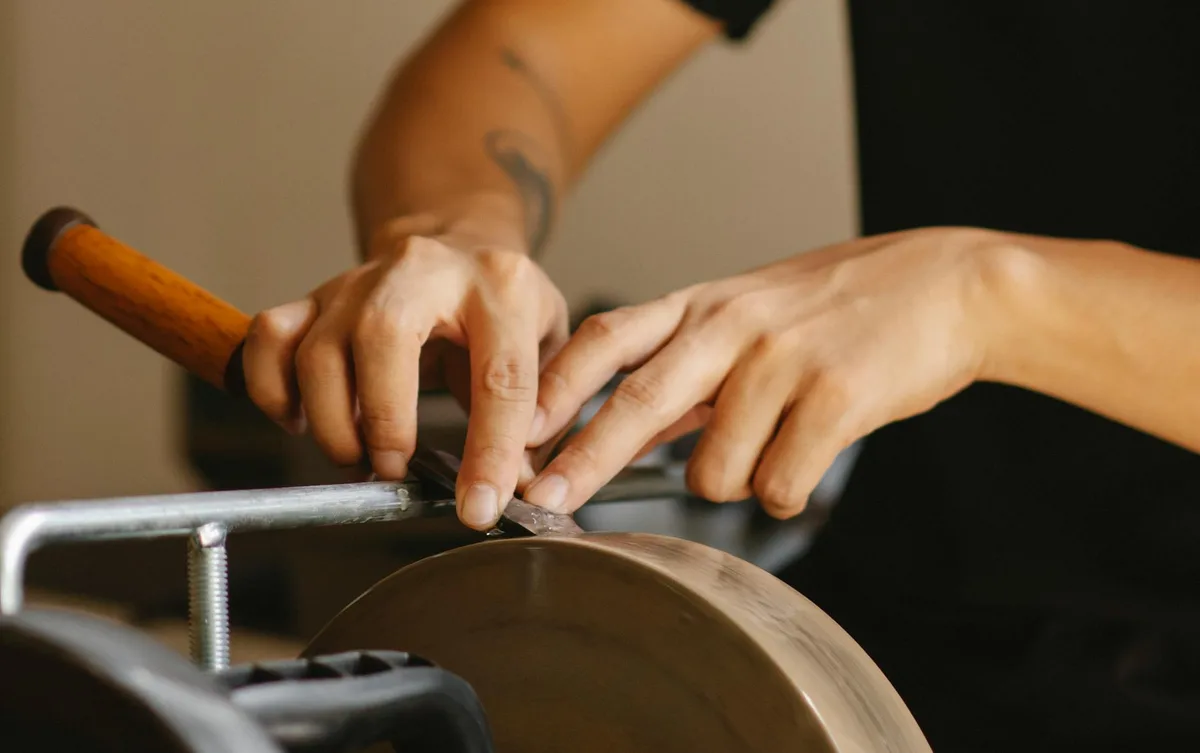
Step 3: Match the Angle and Start Filing
Place the file flat against the bevel face. The file should sit naturally against the full width of the bevel without rocking. That's your angle. Don't try to measure it exactly.
Just match what's already there.
Push the file along the blade in smooth, even strokes, following the curve of the blade from base to tip. Use moderate pressure on the push stroke and lift slightly on the return. Ten to fifteen consistent strokes on a moderately dull blade is usually enough. Watch the edge as you work.
You're looking for a bright, consistent line of fresh metal along the full length.
Step 4: Read the Burr — Your Confirmation Signal
After several strokes, run your thumb lightly and carefully across the flat side of the blade near the edge. Don't drag it along the edge. Go across it, perpendicular. You should feel a slight roughness or catch.
That's the burr, a tiny curl of metal that forms on the opposite side when you've filed enough. If you feel it consistently along the full length of the blade, you've sharpened evenly. If it's only in patches, keep filing the spots where you can't feel it yet.
Step 5: Deburr the Flat Side
Lay your flat stone or the back of the file completely flat against the flat face of the blade. One or two light, even passes along the full length is enough to knock the burr off. Don't angle the stone. Keep it completely flat.
Angling it even slightly starts to create a secondary bevel on the flat side, and that closes the gap between the blades and ruins the cutting geometry.
Step 6: Reassemble, Adjust, and Test
If you disassembled the blades to sharpen, reassemble them and snug the pivot bolt. The blades should close smoothly with no wobble and no binding. A tight pivot makes the lopper stiff and tiring to use. Too loose and the blades flex apart mid-cut.
Test on a sheet of paper first. A sharp bypass lopper should slice paper cleanly with no tearing. Then test on a live green stem. The cut should be clean and flat with no crushing.
How to Sharpen Fiskars Anvil Loppers: Step by Step
Step 1: Clean and Inspect Both Sides
The same cleaning process applies here. Wipe down the cutting blade and the flat anvil jaw. The jaw itself doesn't need sharpening, but if it's deeply grooved from use, a light pass with a flat file across its face can smooth it out and improve blade contact.
Step 2: File Both Bevels Evenly
Hold the file against one face of the cutting blade, matching the existing bevel angle. Use the same push-stroke technique, following the blade's curve. Count your strokes. Whatever you do on the first side, you must replicate on the second.
Even stroke count keeps the edge centered. An off-center edge makes the blade want to deflect sideways through a cut, which is inefficient and hard on your hands.
After filing both sides, check the edge by looking straight down at the tip. The edge should look like a symmetrical point. If it's skewed to one side, give an extra few strokes to the lagging side.
Step 3: Deburr and Finish
Anvil blades produce a small burr on the alternating side with each filing pass. Once both faces are done, strop each side once with a flat stone, keeping the stone parallel to the bevel angle. Wipe the blade clean, check the edge visually, and reassemble.
How to Use the Fiskars Garden Tool Sharpener on Loppers
The Fiskars garden tool sharpener is a pull-through carbide sharpener designed specifically for Fiskars blades. It's faster than a file and requires no angle-matching skill. You pull the blade through the carbide slot in a single smooth stroke, and the pre-set angle does the work for you.
It works well for bypass loppers as a quick touch-up between full sharpenings. The carbide edges are set to match the standard Fiskars bevel angle, so you're not guessing. Three to five pull-throughs on a lightly dull blade will restore a working edge in under a minute.
There's a trade-off, though. Carbide pull-through sharpeners remove more metal per pass than a flat file. On a blade that's already thinned from years of sharpening, that adds up. Use the Fiskars sharpener for seasonal maintenance, and reach for a mill bastard file when the blade has visible nicks or needs a full re-bevel.
Don't use it on anvil loppers. The carbide slot geometry is designed for a single-bevel bypass blade. Running an anvil blade through it creates an uneven bevel and off-centers the edge.
What the Blade Is Telling You: Visual Cues at Every Stage
Learning to read the blade is what separates a good sharpening job from a wasted one. The metal gives you clear signals at every stage if you know what to look for.
What a Properly Set Bevel Looks Like
A correctly sharpened bypass blade shows a consistent, bright strip of fresh metal running the full length of the bevel face. That bright line should be even in width from the base of the blade to the tip. If it's wide in some spots and narrow in others, your filing pressure wasn't consistent. Go back and even it out with lighter strokes in the narrow spots.
The edge itself, when viewed head-on under good light, should look like a single fine line. No flat spot, no rounded shine along the very tip. A flat, shiny line along the edge means the edge has rolled or been rounded, and you need to file a little more.
What a Raised Burr Looks Like and Feels Like
You won't see the burr easily with the naked eye on a lopper blade, but you'll feel it. Run your thumb pad carefully across the flat side of the blade, perpendicular to the edge. A properly raised burr feels like a faint catch or roughness, like running your thumb across fine sandpaper.
If you're drawing your thumb along the edge rather than across it, stop. That's how you get cut. Always move across the edge, not along it.
What Over-Sharpening Looks Like
Over-sharpening thins the blade behind the edge to the point where the steel becomes fragile. You'll see it as an unusually wide, bright bevel face that tapers to almost nothing at the tip. The edge might feel razor-sharp initially but chips quickly in use because there's not enough steel behind it to support the edge under load.
If you've filed more than fifteen to twenty strokes and the blade still isn't taking a clean edge, the problem isn't lack of filing. Check for a chip, a damaged bevel, or a blade that's simply past its useful life.
What a Blade That Needs Replacing Looks Like
Some blades are beyond sharpening. Replacement makes sense when you see:
- A chip or nick deeper than 2mm that would require removing significant metal to work past
- A wavy or rippled edge caused by uneven past sharpening that has altered the blade profile
- Visible cracks in the blade near the pivot hole
- A blade ground so thin near the edge that it flexes noticeably under finger pressure
- The FrictionFree coating worn entirely through in multiple areas, indicating heavy wear
Fiskars sells replacement blades for several of their lopper models, typically priced between $10 and $25 USD. If the rest of the lopper is in good shape, a replacement blade is a far better call than buying a whole new tool.
Mistakes That Ruin Lopper Blades
Most sharpening mistakes aren't dramatic. They're small errors in technique that compound over time until the blade is unusable. Here are the ones that aggregate user feedback and manufacturer guidance flag most consistently.
Filing the wrong side on a bypass lopper. This is the most common error. Filing the flat counter blade creates a secondary bevel that opens a gap between the blades mid-cut. The loppers start chewing rather than cutting, and no amount of further sharpening fixes it without professional re-grinding.
Changing the bevel angle. If you file at a steeper angle than the original bevel, you're not sharpening. You're creating a new, weaker edge geometry. Always match the angle that's already there. Let the file sit naturally against the bevel face rather than forcing it to a different angle.
Skipping the deburring step. A burr left on the flat side of a bypass blade creates a rough, grabbing edge that tears rather than slices. Takes thirty seconds to fix. Don't skip it.
Over-tightening the pivot bolt after reassembly. The blades should close with light hand pressure. If you need to squeeze hard, the bolt is too tight. Overtightening also puts lateral stress on the blade, accelerating wear at the pivot hole.
Using a grinder for a quick fix. The heat from a bench grinder or angle grinder can remove the temper from Fiskars' hardened steel blades in seconds. A softened blade won't hold an edge through a single pruning session. If a blade has damage that needs grinding, a professional sharpening service with a water-cooled wheel is the right call.
When to Sharpen vs. When to Replace the Blade
This is a judgment call, and the answer comes down to three things: the condition of the edge, the condition of the blade body, and the cost comparison.
Sharpen when:
- The blade is dull but the edge is intact with no chips deeper than 1mm
- The bevel geometry is still identifiable and consistent
- The blade body is straight with no cracks near the pivot hole
- The FrictionFree coating is mostly intact
Replace when:
- Chips exceed 2mm and would require removing significant steel to work past
- The bevel has been filed so many times the blade is noticeably thin behind the edge
- The blade has a visible warp or bend
- Cracks appear near the bolt hole (a safety concern, not just a performance one)
- The total sharpening time needed exceeds what a $15 replacement blade would cost in effort
For Fiskars models with replaceable blades, including several PowerGear and EasyAction lopper lines, Fiskars' own parts pages list compatible replacement blades by model number. Check the model number stamped on the handle or blade before ordering.
Protecting the FrictionFree Coating During Sharpening
Fiskars' FrictionFree coating is a non-stick surface applied to the blade to reduce sap adhesion and cutting friction. It's a genuine functional feature, not just cosmetic. When it's intact, the blade pulls through plant material more easily and stays cleaner between cuts.
The coating sits right at the blade surface, so sharpening will remove some of it near the cutting edge. That's unavoidable and acceptable. The goal is to limit unnecessary removal on the flat face and the body of the blade.
A few practical rules to follow:
- File only along the bevel face, not across the blade flat
- Don't use abrasive pads, steel wool, or sandpaper on the blade body to clean it before sharpening (use a cloth with mineral spirits instead)
- Avoid rotary tools, which strip the coating over a wide area from heat and abrasion
- After sharpening, apply a thin coat of camellia oil or a light machine oil to the blade surface to compensate for any coating loss near the edge
The coating doesn't affect sharpening technique, but keeping as much of it intact as possible extends blade life and keeps the loppers cutting smoothly through resinous wood.
After Sharpening: Oiling, Reassembly, and Storage
Once the blade is sharp and deburred, a few minutes of post-sharpening care will keep it that way through the season.
Oil the blade. Apply a thin coat of camellia oil or a light machine oil (3-in-1 oil works fine) to both blade faces. Wipe off the excess with a clean rag. You want a thin protective film, not a dripping wet blade. This prevents rust from forming on any bare metal exposed during sharpening and keeps the pivot joint moving smoothly.
Check the pivot bolt tension. With the blades reassembled, open and close the loppers a few times by hand. They should move freely without wobbling. If there's lateral play between the blades, snug the bolt a quarter turn at a time until the play disappears. If the blades feel stiff or require more than light hand pressure to close, back the bolt off slightly.
Wipe down the handles. Fiskars' FiberComp handles don't need oiling, but a quick wipe removes grit and sap that accelerates wear on the pivot area over time.
For storage, keep the loppers in a dry location with the blade guard or sheath in place if one came with the tool. Hanging them on a wall hook rather than leaving them on a damp shed floor makes a real difference to long-term blade condition. If you're storing them through winter, a slightly heavier coat of oil on the blade is worth the extra thirty seconds.
How Often Should You Sharpen Fiskars Loppers
Sharpen your loppers at least once per growing season, at minimum. For most home gardeners doing occasional pruning, that means a full sharpening in early spring before the season starts and a quick touch-up with the Fiskars carbide sharpener mid-season if the blade starts to drag.
Frequency scales with use. Landscape professionals and orchardists working with loppers daily may need to sharpen every two to four weeks during peak season. A rough guide based on use patterns:
| Use Pattern | Sharpening Frequency |
|---|---|
| Occasional home gardener | Once per season (spring) |
| Regular home use (weekly pruning) | Every 2 to 3 months |
| Professional / heavy seasonal use | Every 2 to 4 weeks |
| Post-winter storage (any user) | Always sharpen before first use |
There's also a simple field test. Hold a sheet of printer paper upright and draw the lopper blade across the top edge. A sharp blade slices cleanly. A dull blade drags, folds, or tears.
If it tears, sharpen before your next pruning session rather than after.
Another trigger: if you notice your cuts leaving crushed or brown-edged stems rather than clean white or green cuts, the blade needs attention regardless of how recently you sharpened it. Cutting through sandy soil, stones, or wire accelerates edge wear dramatically and can dull a blade in a single session.
FAQs
Can you sharpen Fiskars loppers with a knife sharpener?
A standard kitchen knife sharpener isn't suitable for lopper blades. The slot geometry on most knife sharpeners is designed for thin, straight blades and won't follow the curve of a lopper's cutting blade correctly. You'll get an uneven edge with inconsistent bevel angles across the blade length. Stick to a flat file, diamond rod, or the Fiskars dedicated garden tool sharpener for reliable results.
Do Fiskars loppers come with a warranty that covers blade sharpening damage?
Fiskars offers a full lifetime warranty on most of their lopper products, but it covers manufacturing defects rather than wear from use or sharpening errors. Damage caused by improper sharpening, such as a thinned blade or altered bevel geometry, falls outside warranty coverage. Manufacturer documentation recommends using only appropriate sharpening tools and techniques to avoid voiding the warranty on blade-related claims.
Should you disassemble the loppers completely before sharpening?
Full disassembly isn't always necessary for a routine sharpening. If the blade is accessible and you can hold the tool steady, sharpening with the loppers assembled works fine for most maintenance sharpenings. Disassembly makes sense when the blade needs significant work, when you want to clean the pivot area thoroughly, or when you're inspecting the blade for cracks near the bolt hole. If you do disassemble, keep the pivot bolt, washer, and any spacers together so reassembly is straightforward.
Can you sharpen Fiskars micro-serrated blades?
No. Some Fiskars pruning tools feature micro-serrated edges along the blade, and these shouldn't be sharpened with a flat file or diamond rod. The serrations are formed during manufacturing and can't be restored by hand sharpening without specialist equipment. When a micro-serrated blade loses its edge, replacement is the correct solution.
Check your specific model's documentation on fiskars.com to confirm whether the blade is smooth-ground or serrated before sharpening.
What angle should you sharpen Fiskars lopper blades?
Match the existing bevel rather than aiming for a specific angle. Fiskars bypass lopper blades are typically ground at 20 to 30 degrees from the manufacturer, but the exact angle varies slightly by model. Trying to hold a measured angle during hand sharpening introduces more error than simply resting the file flat against the existing bevel face and following it. If the original bevel has been badly altered by previous sharpening, lay the file at approximately 20 to 25 degrees as a starting reference and file until a consistent fresh bevel forms across the full blade length.
Is it worth getting loppers professionally sharpened?
For most home gardeners, no. A $10 mill bastard file and fifteen minutes of work achieves the same result as a professional sharpening for a standard bypass lopper blade. Professional sharpening makes more sense when the blade has deep chips requiring significant metal removal, when the bevel geometry needs resetting after improper past sharpening, or when you have multiple high-value tools that need work at once. Expect to pay $8 to $20 USD per tool at a professional sharpening service, depending on blade condition and your region.