How to Sharpen Loppers With a Grinder
Dull loppers don't just make pruning harder, they make it damaging. Crushed stems, ragged cuts, and extra physical effort are all signs your blades need attention. Knowing how to sharpen loppers with a grinder is one of those practical skills that saves you money, protects your plants, and turns a frustrating tool back into a reliable one.
Steel temper begins to degrade at around 200°C, which means grinding technique matters as much as the tool itself. Get it wrong and you soften the very hardness that keeps a blade sharp. The good news is that with the right disc, the right angle, and a clear understanding of your lopper type, the whole process is straightforward. Here's what you need to know before you pick up the grinder.
Why Sharp Loppers Actually Matter (And When a Grinder Is the Right Tool)
A sharp lopper blade makes a clean, single-motion cut through woody stems. A dull one compresses and tears the tissue instead, leaving ragged wounds that take longer to callus over and invite disease.
For garden use, that distinction matters more than most people realise. The Royal Horticultural Society consistently links poor-quality cuts to increased vulnerability to fungal infections in pruned plants, particularly on fruit trees and roses.
So when does a grinder make sense over a hand file or whetstone? The answer depends on blade condition.
- Hand file or whetstone works well for routine maintenance, light dulling, and touch-ups between seasons.
- A grinder is the right call when blades are visibly nicked, chipped, or so dull that hand sharpening would take an unreasonable amount of time.
- An angle grinder suits blades with serious edge damage that needs reshaping before finishing.
- A bench grinder suits blades that need controlled, consistent sharpening without the risk of a freehand angle shift.
If your loppers simply need a seasonal touch-up, a diamond sharpening rod or flat file is plenty. But if the edge has chips, heavy corrosion, or hasn't been sharpened in years, a grinder gets the job done in a fraction of the time.
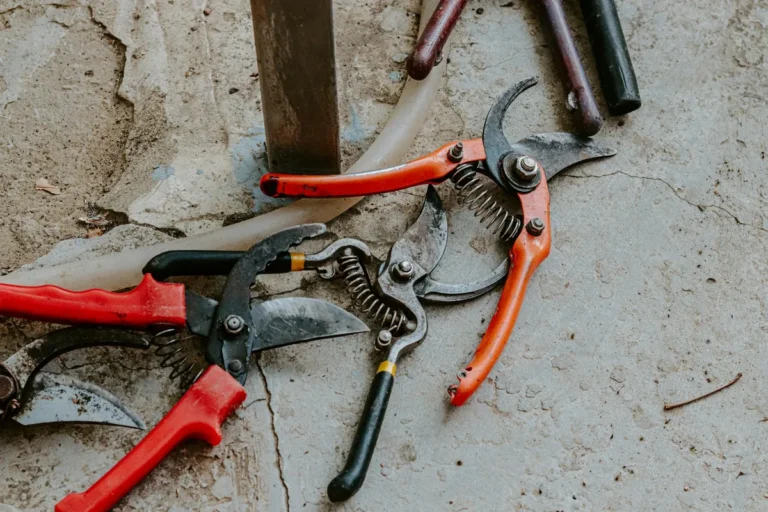
Bypass vs Anvil Loppers: What You're Working With Changes Everything
This is the single most important thing to understand before you start grinding. Bypass and anvil loppers have fundamentally different blade geometry, and sharpening one like the other will ruin the edge.
Bypass loppers work like scissors. Two blades pass each other, with only the upper blade carrying a sharpened bevel. The lower blade is flat on the cutting face and should never be ground on that side. Sharpening the wrong face on a bypass blade, or grinding both sides, destroys the scissor action and makes the loppers worse than useless.
Anvil loppers work like a knife on a chopping board. A single sharpened blade closes down onto a flat anvil jaw. Both sides of the blade carry a bevel, and sharpening means working both faces at roughly equal angles.
| Feature | Bypass Loppers | Anvil Loppers |
|---|---|---|
| Blade count | Two blades (upper + lower) | One blade + flat anvil |
| Bevel type | Single bevel (upper blade only) | Double bevel (both sides) |
| Sharpen which side | Bevel face only | Both faces evenly |
| Typical bevel angle | 20 to 25 degrees | 25 to 30 degrees |
| Best for | Live wood, clean cuts | Dead wood, heavy stems |
Getting this right before you touch a grinder is non-negotiable. If you're unsure which type you have, look at the blades from the side when they're open. Bypass blades cross each other; anvil blades meet flat on flat.
Tools and Materials You Need Before You Start
You don't need a workshop full of equipment. But you do need the right items for the job, because improvising here leads to poor edges and real safety risks.
Grinder options:
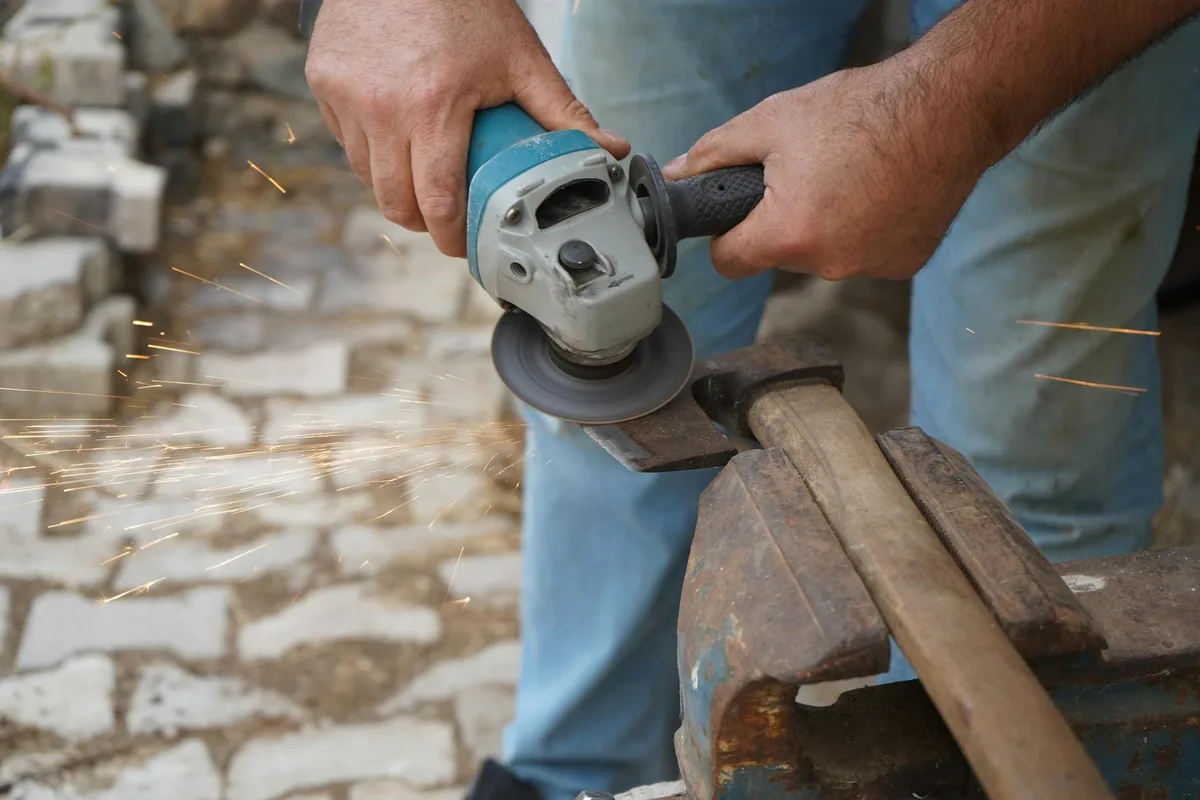
- Angle grinder (4.5-inch) running at 10,000 to 12,000 RPM. Fast material removal, good for damaged blades, but requires a steady hand.
- Bench grinder running at 3,000 to 3,600 RPM. Slower, more controlled, and easier to maintain a consistent angle. Better for beginners.
Disc selection (more on this in the next section):
- Flap disc, 80 to 120 grit, for most sharpening tasks
- Grinding wheel, 36 to 60 grit, for heavy chip removal only
Supporting tools:
- A sturdy bench vice or clamp to secure the blade
- A permanent marker (to trace the bevel before you start)
- A bucket of water or a damp cloth for cooling the blade
- A flat whetstone or fine metal file for burr removal
- Camellia oil, WD-40, or a similar blade oil for finishing
PPE (non-negotiable):
- Full face shield, not just safety glasses
- Cut-resistant gloves for handling sharpened blades
- Hearing protection
- Leather apron or heavy work clothing
None of this is expensive or hard to source. As of 2026, a quality 4.5-inch angle grinder runs between £40 and £80 in the UK and $45 to $90 in the US, and a pack of mixed flap discs costs under £15 / $15.
Safety First: What to Wear and How to Set Up
Grinding produces sparks, metal fragments, and noise levels above 100 dB. That's not a combination to take lightly. The HSE in the UK and OSHA in the US both classify angle grinder use as a high-risk activity requiring proper PPE and a safe working setup.
Workspace setup:
- Work on a stable bench, not a wobbly surface or the ground.
- Clear any flammable materials (rags, sawdust, dry leaves) from the grinding area. Sparks travel further than you'd expect.
- Make sure your bench vice is bolted or clamped securely. A blade that shifts mid-grind is dangerous.
- Keep your water bucket within arm's reach before you start.
Disc safety:
- Always check the grinding disc for cracks before fitting it. Run a visual check and tap it gently. A cracked disc can shatter at speed.
- Confirm the disc's maximum RPM rating matches or exceeds your grinder's speed. This is printed on the disc itself.
- Never use a cutting disc for sharpening. Cutting discs are designed for a different load direction and can break under lateral pressure.
Body position:
- Never hold the blade freehand while grinding. It must be secured in a vice before you switch the grinder on.
- Stand to the side of the grinding arc, not directly in the sparks' path.
- Keep both hands on the grinder at all times while it's running.
A bench grinder is slightly more forgiving than an angle grinder because the blade comes to the wheel rather than the wheel coming to the blade. If you're new to this, starting on a bench grinder reduces the chance of a freehand angle error.
How to Disassemble and Prepare Your Lopper Blades
Trying to sharpen loppers while they're still assembled is a recipe for inconsistent angles and a frustrating result. Disassembly takes five minutes and makes every step after it easier and safer.
Step 1: Remove the pivot bolt.
Most loppers use a single central bolt secured by a nut. Use the appropriate spanner or socket to remove it. Keep the bolt, nut, and any washers together in a small container so nothing gets lost.
Step 2: Separate the blades.
On bypass loppers, you'll now have two distinct pieces: the upper blade (with the bevel) and the lower blade (flat on the cutting face). Keep track of which is which.
Step 3: Clean the blades.
Remove sap residue with white spirit or a dedicated resin cleaner. Scrub surface rust with a wire brush or medium-grit wet-and-dry paper. You need clean metal to accurately assess the edge condition and to grind effectively.
Step 4: Inspect the edge.
Hold each blade up to a light source and look along the edge. Shiny flat spots indicate dull areas. Visible notches or chips indicate damage that needs reshaping before finishing. This inspection tells you how aggressive your grinding needs to be.
Step 5: Mark the bevel with a permanent marker.
Run the marker along the entire bevel face. When you start grinding, the marker will wear away where the wheel is making contact. If it's wearing away evenly across the full bevel, your angle is correct. If only the tip or heel is clearing, you need to adjust.
With the blades clean, inspected, and marked, you're ready to choose your disc and start grinding.
Choosing the Right Disc: Grinding Wheel vs Flap Disc vs Cutting Disc
The disc you fit makes a bigger difference than most people expect. Get it wrong and you'll either remove too much metal too fast, generate excessive heat, or produce a rough edge that needs twice the finishing work.
There are three disc types you'll encounter, and only two of them belong anywhere near a lopper blade.
Flap disc (80 to 120 grit): This is the best all-round choice for sharpening loppers. The overlapping abrasive flaps are more forgiving than a hard wheel, they conform slightly to the blade surface, and they generate less heat per pass. An 80-grit flap disc handles moderately dull or lightly chipped blades well. A 120-grit disc is ideal for finishing and refining an edge that's already close to sharp.
Grinding wheel (36 to 60 grit): Use this only when a blade has serious chips, deep notches, or needs significant reshaping. A hard grinding wheel removes metal fast and generates heat fast. If you use one, work in very short bursts and cool the blade frequently. It's a reshaping tool, not a sharpening tool.
Cutting disc: Never use this for sharpening. Full stop. Cutting discs are thin and designed to slice through material with a forward cutting motion. Applying lateral pressure during sharpening can cause them to flex, crack, or shatter.
The risk isn't worth it.
| Disc Type | Grit Range | Best Use | Heat Risk |
|---|---|---|---|
| Flap disc | 80 to 120 | General sharpening, finishing | Low to moderate |
| Grinding wheel | 36 to 60 | Chip removal, heavy reshaping | High |
| Cutting disc | N/A | Not suitable | Extreme (fracture risk) |
For most home gardeners with moderately used loppers, a single 80-grit flap disc does the whole job from start to near-finish, with a fine whetstone or file for the final burr removal.
How to Read and Match the Existing Bevel Angle
Before you grind a single stroke, you need to understand the angle you're working with. Grinding at the wrong angle doesn't sharpen the blade, it creates a new secondary bevel that weakens the edge and makes the loppers cut less efficiently.
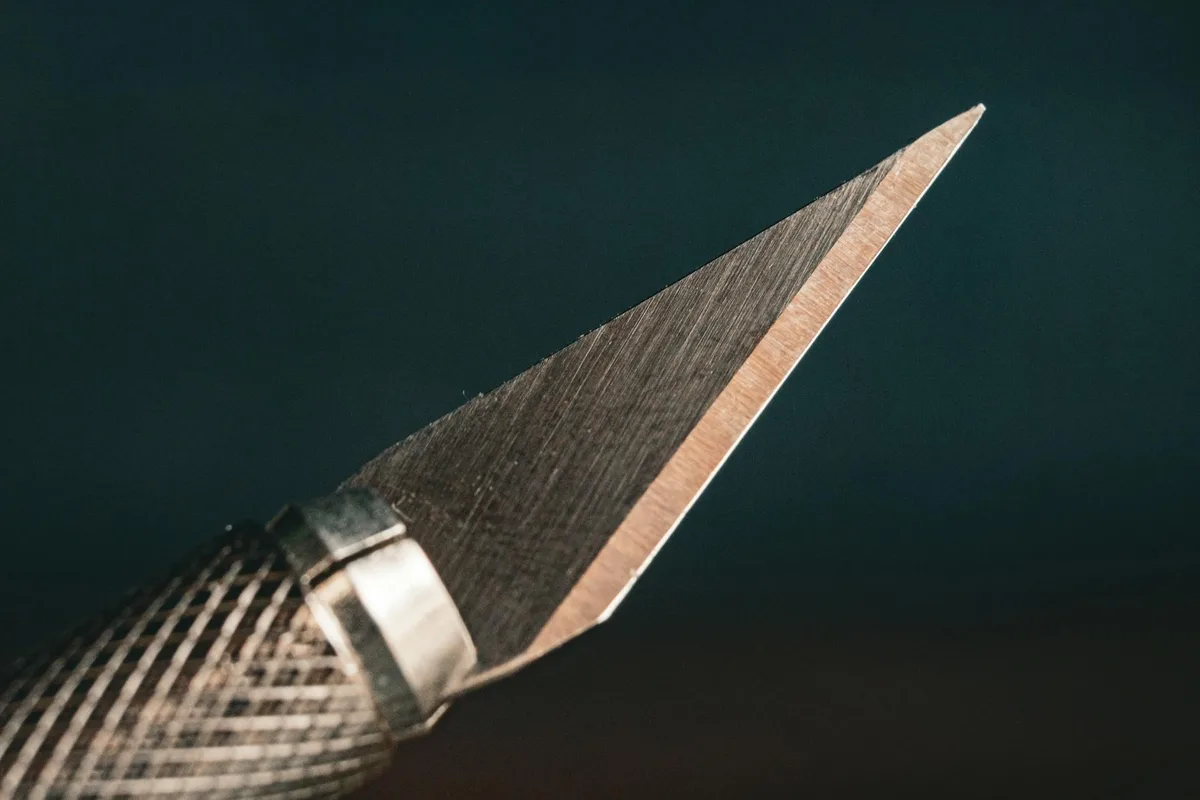
A close-up view of a bypass lopper blade shows the bevel as a flat, angled face leading to the cutting edge. That angle is typically ground between 20 and 25 degrees from the flat face of the blade. You're not trying to create something new; you're restoring what's already there.
How do you find the angle without a protractor?
You don't need one. The permanent marker method described in the preparation section handles this visually. Apply the marker to the full bevel face, make two or three light passes with the grinder, then stop and look. Where the marker has been removed, the wheel is making contact.
Where it remains, it isn't. Adjust your angle until the marker clears evenly across the whole bevel width, from heel to tip.
Bypass Loppers: Bevel Side Only, Never Touch the Flat Face
On a bypass lopper, the upper blade has one bevelled face and one completely flat face. You sharpen exclusively on the bevel side. The flat face must stay flat, because it's that flatness pressing against the lower blade that creates the scissor action. If you grind the flat face, you introduce a gap between the blades and the loppers will start to tear rather than cut.
The lower blade on a bypass lopper is never sharpened on its cutting face. You can lightly deburr it on the flat side if needed, but that's the limit.
Anvil Loppers: Both Sides, Slightly Different Angle
Anvil lopper blades carry a bevel on both faces, meeting at a central edge. The angle is slightly more obtuse, typically 25 to 30 degrees per side, because anvil blades take more impact load. Sharpen both sides in equal passes to keep the edge centred. If you grind one side more than the other, the edge drifts off-centre and the blade will pull to one side during cutting.
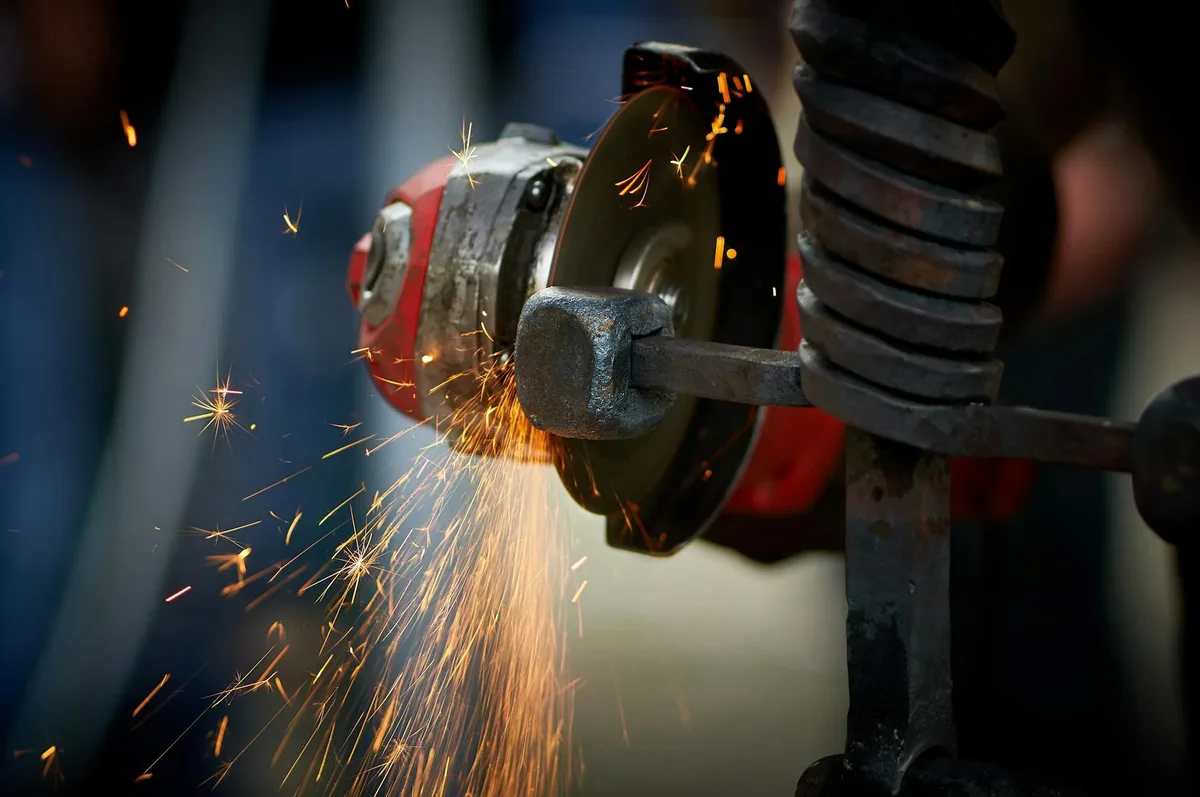
Step-by-Step: Sharpening Loppers with an Angle Grinder
With the blade secured, the disc fitted, and your angle identified, you're ready to grind. Work methodically. Rushing this produces uneven results.
Step 1: Secure the Blade in a Vice
Clamp the blade firmly with the bevel face accessible and the edge pointing away from you. The blade must not move at all during grinding. Any shift mid-pass changes the angle and can catch the disc. If your vice jaws are smooth metal, wrap the blade in a folded cloth first to protect any coating.
Step 2: Set Your Angle and Make Your First Passes
Hold the grinder so the disc face sits flush with the bevel angle. Use both hands, keep your elbows tucked, and sweep the grinder along the blade in smooth, consistent strokes from heel to tip. Don't press hard. Let the disc do the work.
Light, consistent pressure produces a cleaner edge than aggressive pushing.
Step 3: Read the Metal (Colour, Reflection, and Burr Formation)
Stop after every four or five passes and look at the blade. Two things tell you how you're doing.
- Colour change: If the steel is turning yellow, straw-coloured, or blue, you're overheating it. Stop immediately, cool the blade in water, and use lighter passes going forward.
- Burr formation: Run your thumb gently across the flat face (not along the edge). When you feel a slight roughness or wire edge along the full length of the blade, you've ground enough. That burr means metal has been pushed all the way to the edge, which confirms the bevel is fully sharpened.
Step 4: Cool the Blade and Check Your Progress
Dip or wipe the blade with your damp cloth every few passes, especially if you're using a grinding wheel rather than a flap disc. You're aiming to keep the blade cool enough to hold comfortably. If it's too hot to touch, it's too hot to keep grinding without a break.
Check your marker line regularly. By the time the marker has fully cleared and a consistent burr has formed along the whole edge, your sharpening pass is complete.
Step 5: Remove the Burr on the Flat Face
This step is where many people stop too early. The burr (also called a wire edge) is a thin curl of metal pushed over the edge during grinding. It feels sharp but it folds over immediately under load, leaving a disappointingly rough-cutting edge.
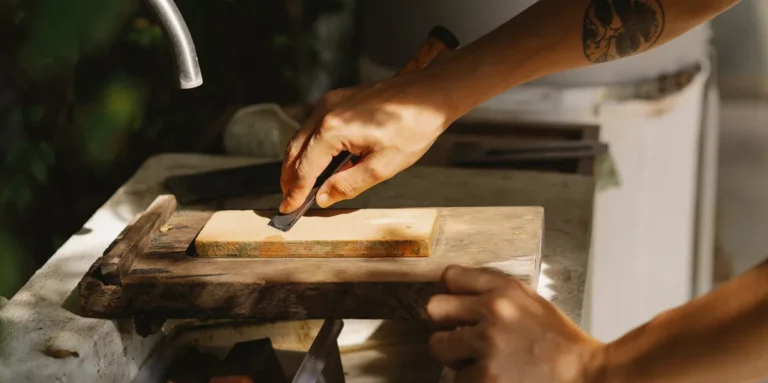
To remove it, lay a flat whetstone or the flat face of a fine metal file flush against the flat side of the blade. Make two or three light strokes along the full length. You're not sharpening here; you're just knocking the wire edge off cleanly. One or two passes is usually enough.
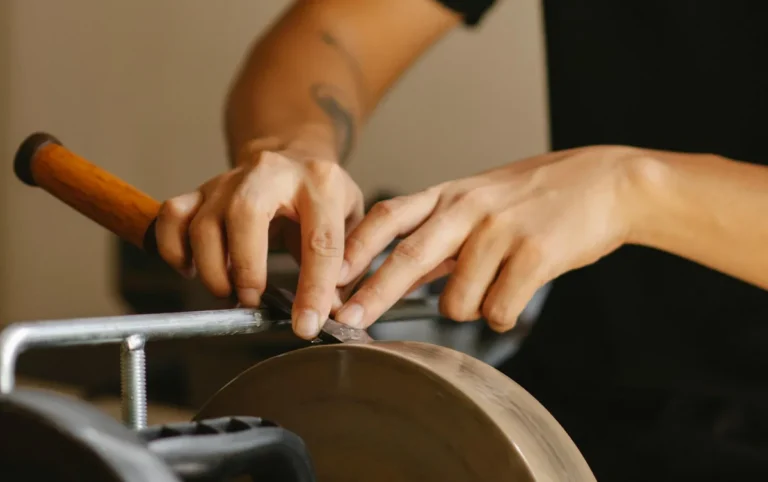
Step-by-Step: Sharpening Loppers with a Bench Grinder
The process on a bench grinder follows the same logic, but the dynamic is reversed: instead of bringing the wheel to the blade, you bring the blade to the wheel. That changes your body mechanics and your control points.
Set the bench grinder's tool rest as close to the wheel as safely possible, ideally within 3mm (1/8-inch), per standard safe-use guidance from abrasive wheel standards bodies. A wide gap lets the blade catch between the rest and the wheel.
Switch the grinder on and let it reach full speed before presenting the blade. Hold the blade at your target bevel angle against the wheel face and move it smoothly from side to side, heel to tip, keeping consistent contact pressure. The slower RPM of a bench grinder (around 3,000 to 3,600 RPM versus the angle grinder's 10,000 to 12,000 RPM) gives you more reaction time if the angle drifts, which is why many people find it easier to learn on.
Cool and check on the same schedule: every four or five passes, pull the blade back, check colour, check marker clearance, check for burr formation. Finish with the same flat-face burr removal using a whetstone.
One practical difference worth knowing: bench grinders typically use aluminium oxide wheels, which can load up (glaze over) when grinding softer steel. If you notice the wheel stops cutting efficiently, dress it with a wheel dresser before continuing. A glazed wheel generates more heat and less material removal, which is the worst combination.
Mistakes That Ruin a Blade (And How to Spot Them in Real Time)
Most sharpening problems are fixable if you catch them early. A few are not.
Overheating the steel. Blue or dark straw colouring on the blade means the steel's temper has been compromised. The hardness that holds a sharp edge has been reduced and it won't come back. Prevention is the only option: cool frequently, use light passes, and never dwell in one spot.
Grinding the flat face of a bypass blade. If you've done this, you'll notice the loppers start to gap or bind when you reassemble them. Mild cases can sometimes be corrected by lapping the flat face on a flat whetstone to restore a true flat surface. Severe cases mean a replacement blade.
Inconsistent angle across the blade length. The tip of a lopper blade is easier to over-grind than the heel because there's less blade mass. If the marker clears at the tip but not the heel, you're tilting the grinder upward at the tip. Keep the grinder angle fixed and let your sweep carry the blade through, rather than rocking the grinder.
Skipping burr removal. Aggregate feedback from tool sharpening communities consistently reports this as the most common reason freshly sharpened loppers still cut poorly. The burr feels sharp but performs badly. Always finish with a flat stone on the flat face.
Using a cracked or wrong-rated disc. A disc rated below your grinder's RPM can fail catastrophically at speed. Check the disc rating every time, not just the first time you fit it.
Grinder vs Hand File vs Whetstone: Which Method Fits Your Situation
The right sharpening method depends on blade condition, not personal preference. Each approach has a clear use case, and matching the tool to the job saves both time and metal.
If the blade is chipped or heavily damaged: Start with a grinder. No amount of hand filing will efficiently remove a chip or reshape a rolled edge. Use the grinder to restore the bevel geometry, then switch to a finer method for finishing if needed.
If the blade is dull but undamaged: A diamond sharpening rod or a flat mill file handles this well without the risk of overheating or over-grinding. This is routine maintenance territory, and a grinder is more tool than the job needs.
If the blade is in good shape but needs a quick seasonal refresh: A whetstone or ceramic rod takes two or three minutes and restores a working edge without removing significant metal. Lopper blades sharpened this way regularly will last years longer than those left until they need a grinder.
| Method | Best Blade Condition | Speed | Skill Required | Heat Risk |
|---|---|---|---|---|
| Angle grinder | Chipped, heavily dull, damaged | Fast | Moderate to high | High |
| Bench grinder | Moderately dull, consistent reshaping | Moderate | Low to moderate | Moderate |
| Metal hand file | Lightly dull, routine maintenance | Slow | Low | None |
| Diamond sharpening rod | Lightly dull, touch-up | Fast | Low | None |
| Whetstone | Seasonal refresh, finishing | Slow | Low | None |
One pattern worth noting: aggregate feedback from professional arborists and horticultural tool suppliers consistently shows that loppers maintained with regular light sharpening (file or rod, two or three times per season) rarely need a grinder at all. The grinder becomes necessary mainly when maintenance has been skipped for a full season or more.
What about a Dremel or rotary tool?
A rotary tool works on lopper blades but suits narrow or hard-to-reach bevels better than standard lopper geometry. The small grinding stones and abrasive discs available for rotary tools are more appropriate for serrated blades, pruning saw teeth, or tight concave bevels. For standard bypass or anvil loppers, a flap disc on an angle grinder or a flat file is faster and easier to control.
Reassembly, Pivot Tension, and Final Edge Testing
Reassembly isn't just reversing the disassembly. Pivot tension directly affects how the loppers cut, and getting it wrong undoes the sharpening work you've just done.
Start by wiping both blades down with a clean cloth. Apply a thin film of camellia oil or WD-40 to the blade faces and the pivot area before reassembling. This reduces friction during use and slows rust formation, particularly in wet climates.
How tight should the pivot bolt be?
The pivot bolt should be tight enough that the blades don't wobble laterally, but loose enough that they open and close under their own spring tension without stiffness. On most bypass loppers, there's a locking nut and an adjustment nut. Set the adjustment nut first until blade movement feels smooth, then lock it in place with the locking nut.
If the blades feel stiff after reassembly, back the pivot bolt off by a quarter turn and recheck. If they wobble or gap visibly during a cut, tighten by the same increment. It's a quick iterative adjustment, not a precise torque specification.
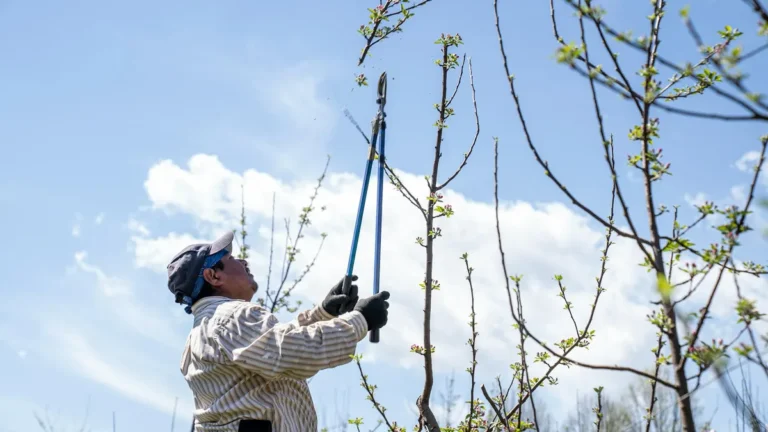
How do you know the sharpening actually worked?
Cut a green stem roughly 10 to 15mm (3/8 to 5/8-inch) in diameter. A properly sharpened bypass lopper makes a clean, single-motion cut with no compression or tearing at the stem surface. If the cut requires two attempts or leaves a crushed edge, the blade either needs more burr removal or the pivot tension is too loose, causing the blades to splay during the cut rather than passing cleanly.
Anvil loppers should cut cleanly through similarly sized dead wood without the blade deflecting or rolling off to one side. If it deflects, the bevel is uneven between the two sides, and one face needs an additional light pass on the grinder or file.
After Sharpening: Cleaning, Oiling, and Storage
A freshly sharpened blade exposed to moisture will start rusting within hours if left untreated. Post-sharpening care is quick and genuinely extends the time between sharpenings.
Clean the blades thoroughly. Remove any metal filings, grinding residue, or water used for cooling. A clean, dry cloth works fine. If there's any residue from the grinding disc material, wipe it away before oiling, because abrasive particles left on the blade will accelerate wear during storage.
Oil every metal surface. Camellia oil is the preferred choice among Japanese tool manufacturers and is recommended by brands including Felco and Bahco for carbon steel blades. It's light, stable, and doesn't gum up over time the way some general-purpose oils can. WD-40 is a decent substitute for short-term protection but evaporates faster and offers less lasting coverage in humid conditions.
Store correctly. Don't leave loppers in a damp shed or hanging in a spot where condensation collects on the blades. A dry storage area, ideally with the blades lightly oiled and a blade cover fitted if one came with the loppers, is all that's needed. Some users wipe a thin coat of petroleum jelly onto blades stored over winter, which provides reliable long-term corrosion protection.
One additional step worth doing every few months: check the pivot area for sap or grit buildup. Sap is acidic and accelerates metal corrosion at the pivot point specifically. A quick clean with white spirit and a re-oiling keeps the pivot moving freely and prevents the kind of binding that puts extra strain on the blade edge during use.
FAQs
How often should loppers be sharpened?
For regular garden use, sharpening once or twice per season is enough. Professional users cutting woody stems daily may need a touch-up with a hand file every few weeks. The practical test is straightforward: if the loppers need noticeably more effort than usual or are leaving torn cuts rather than clean ones, they need sharpening regardless of the calendar.
Can I sharpen loppers without disassembling them?
You can, but the results are worse. Sharpening assembled loppers makes it harder to secure the blade properly, harder to maintain a consistent angle, and harder to access the full length of the bevel from heel to tip. Disassembly takes five minutes and is worth it every time for a grinder sharpening session. For a quick touch-up with a hand file or diamond rod, assembled sharpening is acceptable.
What grit should I start with on a badly damaged blade?
Start with a 36 to 60-grit grinding wheel or coarse flap disc to remove chips and reshape the edge profile. Once the damage is gone and the bevel geometry is restored, switch to an 80 to 120-grit flap disc to refine the surface and work toward the final edge. Finishing with a fine whetstone or ceramic rod on the flat face removes the burr and polishes the edge enough for clean cutting.
Will sharpening eventually wear the blade down too much?
Over many years of sharpening, yes, blade width does reduce. But loppers maintained with regular light sharpening (removing minimal metal each time) rather than infrequent heavy grinding lose material far more slowly. Manufacturer documentation from Felco and Fiskars both indicate that quality hardened steel blades can be sharpened dozens of times over their working life before blade geometry becomes an issue. Replacement blades are available for most quality lopper models, so a worn blade doesn't necessarily mean a worn-out tool.
Why do my loppers still tear stems after sharpening?
Three things cause this. The burr wasn't fully removed from the flat face, which is the most common reason. The pivot bolt is too loose, causing the blades to gap during the cut rather than passing cleanly. Or the wrong blade was sharpened on a bypass lopper, particularly bevelling the lower blade's cutting face.
Work back through the burr removal step first, then check pivot tension, before assuming the sharpening itself was the problem.
Is an angle grinder safe for a beginner to use for this?
It's manageable with proper setup, but a bench grinder is more forgiving for someone new to blade sharpening. The lower RPM and fixed wheel position make angle control easier to learn. If an angle grinder is all you have, take extra care to secure the blade firmly in a vice, use a flap disc rather than a hard grinding wheel, and work in short passes with frequent stops to check progress. Rushing is where accidents and ruined blades both come from.