How to Sharpen Garden Shears With a Stone
Knowing how to sharpen garden shears with a stone is one of those skills that pays for itself every single season. Dull blades don't just make cutting harder, they crush plant stems instead of slicing them cleanly, which creates entry points for disease. A sharp edge is genuinely better for your plants, not just your hands.
Most garden shears need sharpening two to four times during an active growing season, according to Royal Horticultural Society tool maintenance guidance. The good news is you don't need fancy equipment. A combination whetstone (coarse on one side, fine on the other) in the £8 to £25 range handles the job reliably. Here's exactly how to do it right.
Why Your Garden Shears Are Probably Duller Than You Think
Shears go dull gradually, which is the problem. There's no single moment where they obviously fail. Instead, you start pressing harder, stems start getting pinched rather than cut, and you assume that's just how it goes.
A clean cut on a healthy stem should require one confident squeeze. If you're repositioning the blade, sawing back and forth, or using two hands where one used to do it, the edge is gone. Aggregate reviews of gardening tool maintenance practices consistently show that most home gardeners sharpen their tools far less frequently than manufacturers recommend.
The other thing worth knowing: dull shears are genuinely harder on plants. University of California Cooperative Extension research on plant disease transmission confirms that crushed or torn cuts heal more slowly and invite fungal and bacterial pathogens. Sharpening isn't just a tool maintenance habit. It's plant care too.
What You Need Before You Start (Stones, Oil, and a Few Basics)
You don't need a lot. But using the wrong stone or skipping lubrication wastes your time and can damage the blade.
Here's what to have on hand before you start:
- A sharpening stone (see below for which type)
- Honing oil or clean water, depending on your stone type
- A clean rag or paper towels
- Steel wool or a wire brush (for any surface rust)
- Turpentine, rubbing alcohol, or a citrus-based cleaner (for sap)
- A cut-resistant glove for the hand holding the blade
- A small adjustable spanner or screwdriver (for the pivot bolt, if needed)
Choosing the Right Stone: Whetstone, Diamond, or Arkansas?
Each stone type has a genuine sweet spot, and picking the right one saves time.
| Stone Type | Best For | Pros | Cons |
|---|---|---|---|
| Combination whetstone | Most home gardeners | Cheap, versatile, widely available | Can dish (warp) over time |
| Diamond sharpening stone | Faster removal, neglected blades | Stays flat, cuts fast | More expensive upfront |
| Arkansas stone (oil stone) | Fine finishing work | Very hard, long-lasting | Slow cutting, needs oil |
| Japanese water stone | Fine edges, experienced users | Excellent finish | Soft, wears and dishes faster |
For the vast majority of garden use, a combination whetstone or a diamond stone covers everything. Arkansas stones are better suited to finishing knives than rehabilitating a garden blade with real damage.
What Grit Do You Actually Need?
Grit is the number that tells you how aggressively a stone cuts. Lower number equals coarser cut.
- 120 to 400 grit (coarse): Use this first if the blade is notched, very dull, or rusty. It removes metal fast.
- 400 to 800 grit (medium): The workhorse range for regular sharpening. Most maintained blades start here.
- 800 to 2000+ grit (fine): Finishing only. Refines the edge after medium work is done.
A combination stone with 400 grit on one side and 1000 grit on the other handles 90% of garden shear sharpening situations without needing anything else.
Know Your Blade Before You Touch the Stone
This is where most sharpening attempts go wrong before they've even started. If you sharpen the wrong side, or hold the wrong angle, you're not sharpening the blade. You're just wearing it down.
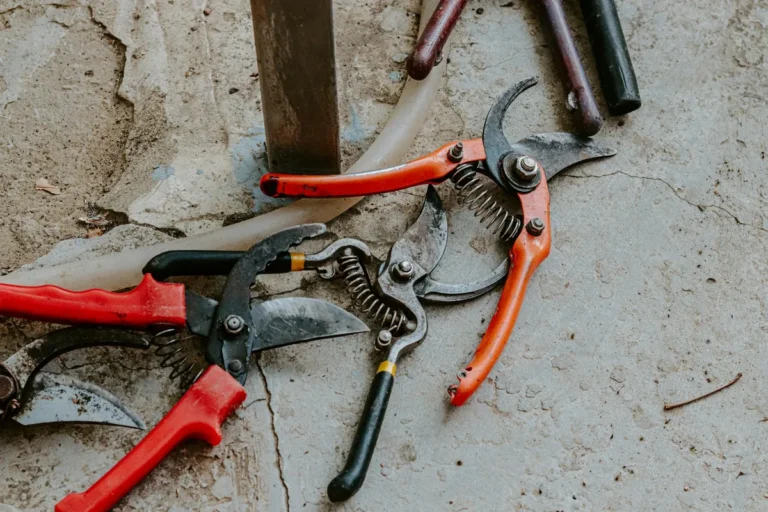
Bypass Shears vs. Anvil Shears: Why It Changes Everything
These two shear types look similar but cut completely differently, and they need different sharpening approaches.
Bypass shears work like scissors. Two blades pass each other, with one beveled cutting blade doing the slicing. Only the beveled face gets sharpened. The flat back of the cutting blade stays flat and only gets a light deburring pass.
Anvil shears have one blade that closes down onto a flat anvil plate. The single blade is typically ground on both sides (double bevel), so both faces need sharpening equally.
Getting this wrong is a very common mistake. Sharpening the flat back of a bypass blade as if it were beveled creates a double edge that actually reduces cutting efficiency and causes the blade to push stems sideways rather than slice through them.
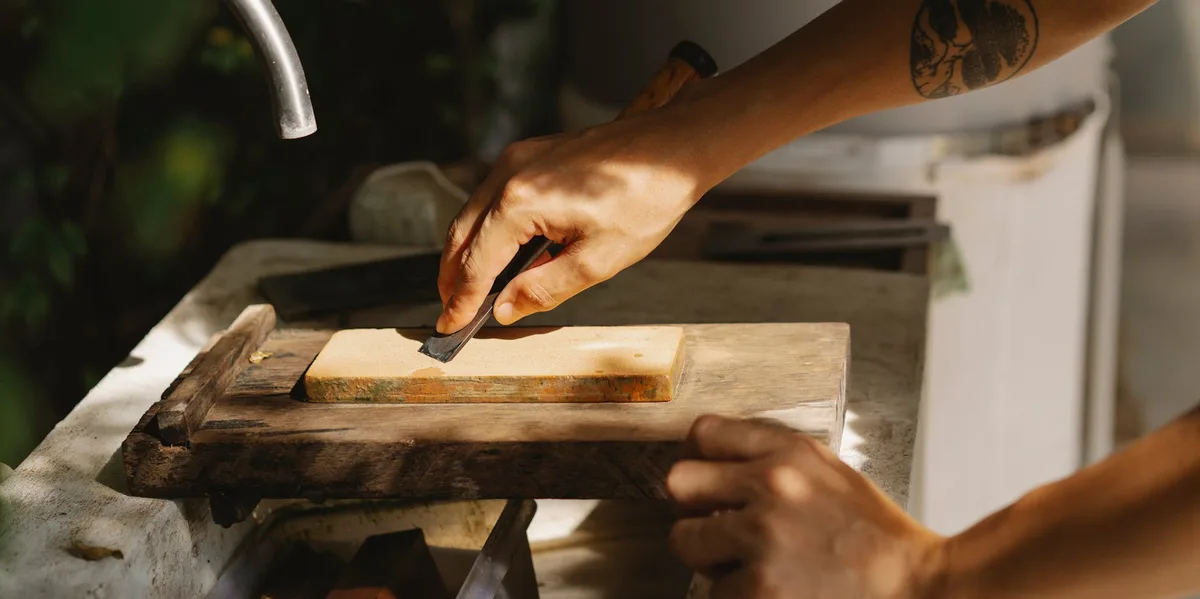
How to Find the Bevel (and Why You Only Sharpen One Side on Bypass Blades)
Hold the bypass shear blade up to a light at eye level. Tilt it slowly. You'll see one face has a slight angled grind running to the cutting edge. That's the bevel.
That's the side you sharpen.
The opposite face is flat all the way to the edge. Run your fingernail across the flat back near the cutting edge and it should catch nothing. That face only gets a light deburring stroke at the very end, never a full sharpening session.
What the Correct Bevel Angle Looks Like (15 to 25 Degrees)
Most bypass garden shears leave the factory with a bevel angle between 15 and 25 degrees. Felco and Bahco, two manufacturers known for precision tool specs, both confirm this range in their official maintenance documentation.
You don't need a protractor. The practical approach is to lay the stone flat against the existing bevel and feel where it sits flush against the whole face. That contact point is your angle. Hold it there and don't let it shift.
Consistency matters far more than hitting an exact number.
Prep Your Shears Before Sharpening
Sharpening dirty blades is counterproductive. Sap and rust contaminate the stone, clog the grit, and prevent the stone from making proper contact with the steel.
Removing Sap, Rust, and Grime First
Sap: Wipe the blade down with turpentine, rubbing alcohol, or a citrus-based solvent on a rag. Sap is sticky and stubborn. Give it 30 seconds to soften before wiping.
Rust: Light surface rust scrubs off with fine steel wool. For heavier oxidation, a wire brush followed by a rust-removing product (used per the manufacturer's instructions, in a ventilated space) clears the surface before you sharpen.
Once the blade is clean and dry, you'll be able to see the bevel clearly and make proper contact with the stone.
When to Disassemble the Pivot Bolt (and When You Don't Need To)
You don't always need to take the shears apart. If the blades open wide enough for you to lay the stone flat against the bevel without the other blade getting in the way, work with them assembled.
Disassemble when:
- The blades are too close together to get a clean sharpening angle
- You want to sharpen and clean each blade individually
- The pivot is so loose the blades shift during sharpening
To disassemble, unscrew the pivot bolt (usually a standard or Phillips head), separate the blades, and keep the bolt, nut, and any washers together in a small dish. Reassembly torque matters too, which is covered later.
How to Check If Your Stone Needs Flattening
A dished stone (one that's become concave in the middle from repeated use) creates a curved sharpening surface. That transfers to the blade as an uneven edge, often with a hollow in the middle and higher spots at each end.
Run a straight edge (a ruler or the flat spine of a knife) across your stone lengthwise. If it rocks or you can see daylight under the middle, the stone needs flattening before you use it. A lapping plate or a sheet of wet-and-dry sandpaper (120 grit) on a flat surface fixes this in a few minutes of circular rubbing.
As of 2026, combination whetstones remain the most widely used option for home garden tool sharpening, and they're also the most prone to dishing over time. Diamond stones stay flat indefinitely, which is one practical reason their higher upfront cost pays off for regular users.
How to Sharpen Garden Shears with a Stone: Full Step-by-Step
Work through these steps in order. Don't skip ahead to the fine grit before the coarse work is done, and don't stop before the burr forms.
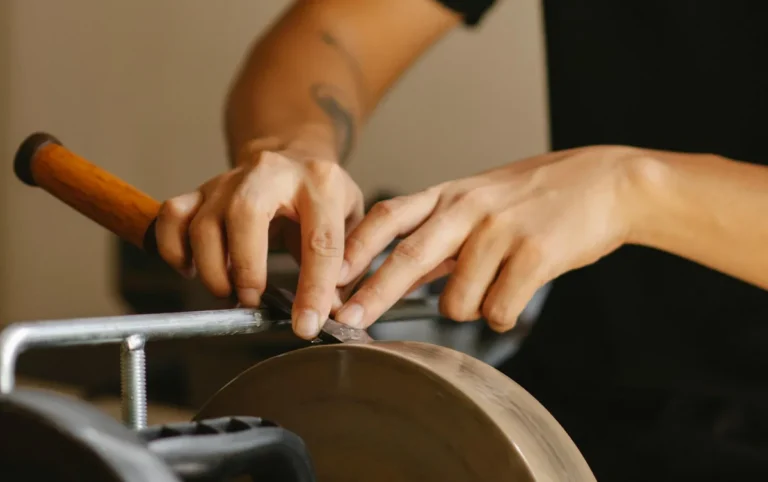
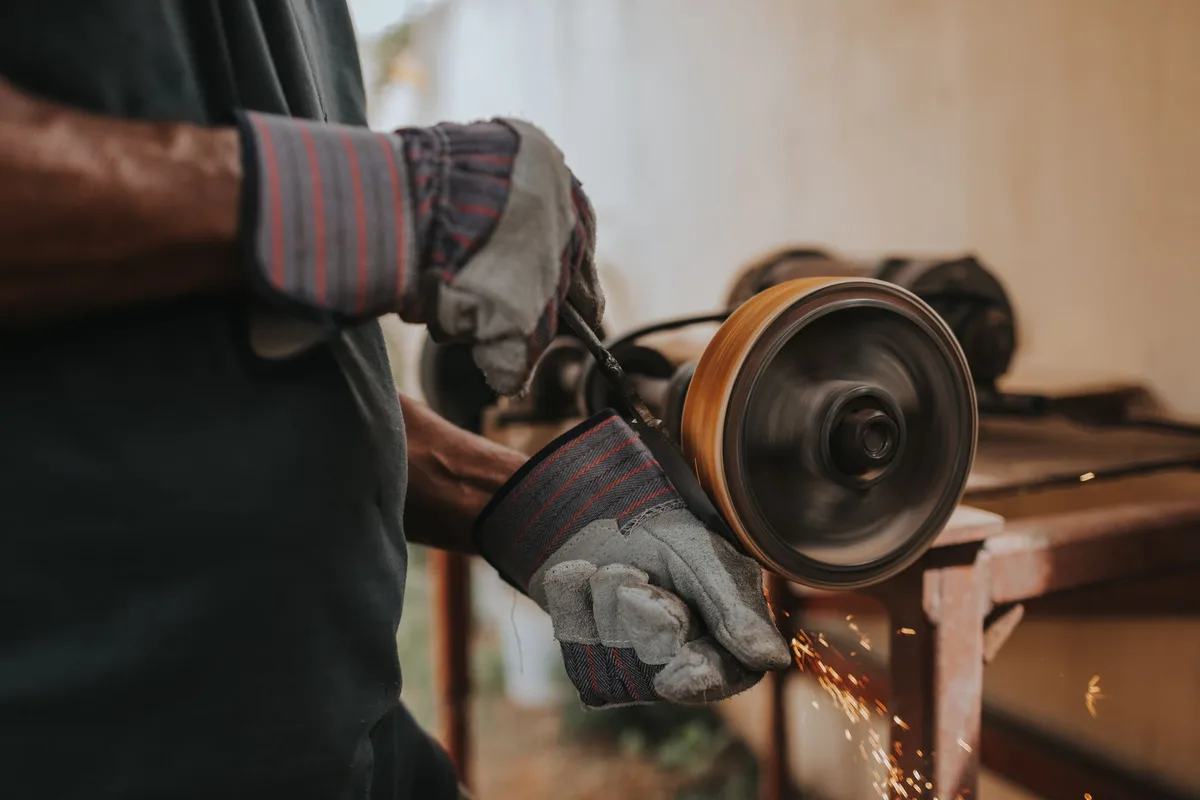
Step 1 — Set Your Stone and Lubricate It Correctly
- Water stones: Submerge in water for 10 to 15 minutes before use. Keep them wet throughout.
- Oil stones (Arkansas): Apply a few drops of honing oil across the surface before starting. Reapply as it dries out.
- Diamond stones: Most can be used dry or with a small amount of water. Check manufacturer guidance.
Set the stone on a stable surface. A damp cloth underneath stops it sliding. If you're sharpening with the blade disassembled, you can hold the blade in one hand and the stone in the other. If the shears are assembled, clamp them gently or brace them against a workbench.
Step 2 — Match the Blade's Bevel Angle and Lock It In
Lay the stone flat against the beveled face of the blade. Feel for full contact across the whole bevel surface. That's your angle. Your job now is to maintain it consistently through every stroke.
A lot of people angle the stone too steeply out of habit. Too steep and you're grinding a new secondary bevel. Too shallow and you're polishing the flat of the blade rather than cutting a new edge. Match the existing factory bevel first, every time.
Step 3 — The Sharpening Stroke (Direction, Pressure, and Consistency)
Stroke the stone along the blade in the direction that moves from the base of the blade toward the tip, following the curve of the cutting edge. Push strokes (stone moving away from you toward the tip) are the standard technique for garden shears.
Apply firm, even pressure on the forward stroke. Ease off on the return. Keep the angle locked. Count your strokes and alternate in sets of 10 to keep the metal removal even.
Start on the coarser grit side if the blade is genuinely dull or damaged. Move to the finer side once the coarse work is done.
Step 4 — How to Check for a Wire Burr (This Is the Key Step Most People Skip)
A wire burr (also called a feather edge) is a thin sliver of metal that folds over to the flat back of the blade as you grind the bevel. Feeling it confirms you've sharpened enough on that pass. Without a burr, you haven't reached the edge and the blade won't be sharp.
To check: with a cut-resistant glove on, lightly drag your fingertip across the flat back of the blade from heel to tip. You're feeling for a slight roughness or catch, not running your finger along the edge. The burr feels like a tiny wire ridge. Once you feel it running continuously from heel to tip, the bevel side is done.
If you feel it in patches but not the full length, keep sharpening. The gaps are where the edge still hasn't been fully cut.
Step 5 — Deburring the Flat Back
Flip the blade over to the flat back. With light pressure only, make two or three flat strokes on the fine grit side of the stone, keeping the stone absolutely flat against the face. This knocks the burr off.
Don't angle the stone. Don't try to create a bevel on this side. Flat strokes only. The goal is a clean, flat back with no wire hanging off the edge.
Check again with your fingertip. The roughness should be gone. If a smaller burr has formed on the bevel side, alternate one or two light strokes on each side until it clears completely.
Step 6 — Finishing Strokes and the Strop
Switch to the fine grit side (if you haven't already) and run five to ten light strokes on the bevel face to refine the edge.
For the sharpest possible result, strop the blade. A piece of leather or even a strip of denim pulled taut works well. Run the bevel face along it at the same angle, trailing edge first (so you're pulling the edge, not digging it in). Ten strokes on the bevel, two or three flat strokes on the back.
This aligns any remaining microscopic burr and leaves a noticeably keener edge.
How to Tell When the Edge Is Actually Sharp
Sharp is a feeling as much as a result. The paper test is the quickest check: hold a sheet of printer paper vertically and slice down through it with the shear blade. A sharp edge cuts cleanly with no tearing. A dull edge crumples or drags the paper sideways.
The green stem test is more realistic for garden use. Find a living stem roughly the diameter you'd normally cut, something like a rose cane or a soft woody shrub stem. One clean squeeze should sever it completely, leaving a flat, smooth cut face with no crushing or fraying at the edges.
If the cut face looks bruised, compressed, or fibrous rather than clean, the blade needs more work on the medium grit before you move to fine finishing. Don't skip back to coarser grit unless the blade has a real nick or flat spot. Medium grit and more consistent strokes usually solve it.
Reassembly, Oiling, and the Final Cut Test
If you disassembled the pivot bolt, reassemble it now. Thread the bolt back through both blades, add any washers in the original order, and hand-tighten the nut before using a spanner to snug it down. The correct tension is firm but not locked. The blades should open and close smoothly under their own weight when you tip the shears sideways.
Too tight and the blades bind, making cutting harder and wearing the edges unevenly. Too loose and the blades flex sideways during a cut, producing that characteristic crushing action rather than a clean slice. Felco's official maintenance guidance describes the correct pivot tension as allowing the blades to fall open slowly under gravity when held horizontally.
Once reassembled, wipe both blade faces with a light oil. Camellia oil is the preferred choice among professional gardeners and is endorsed by several quality tool manufacturers for its rust prevention and non-toxic profile. A few drops of 3-in-1 oil works equally well for most home users. WD-40 is fine for a quick post-session wipe but it's primarily a water displacer, not a long-term protectant.
Run your final cut test on a live stem. If it passes cleanly, you're done.
Visual Mistakes That Ruin the Edge
Most sharpening errors are visible if you know what to look for, either in the blade geometry or in the cut quality afterward. These are the ones that come up repeatedly in gardening community feedback and manufacturer troubleshooting guides.
Sharpening the Wrong Side of a Bypass Blade
This is the single most common mistake. The flat back of a bypass blade looks like it needs sharpening because it sits right at the cutting edge. It doesn't. Grinding a bevel onto the flat back creates a double-edged geometry that causes the blade to push plant stems sideways instead of slicing through them.
If you've done this accidentally, the fix is to regrind the flat back flush on a coarse stone, held perfectly flat, until the unintended bevel is removed. It takes time and removes more metal than it should. Prevention is far easier than the repair.
Letting Your Angle Drift Mid-Stroke
Angle drift is subtle and cumulative. Each slightly inconsistent stroke builds a slightly rounded bevel face instead of a flat one. A rounded bevel still cuts, but it dulls faster and is harder to re-sharpen cleanly next time because you're no longer working a defined geometric surface.
A practical fix is to slow down and count strokes rather than rushing through them. If you feel the stone rocking at any point during a stroke, stop, reset your angle, and continue. Steady and slow beats fast and inconsistent every time.
Skipping Coarse Grit on a Damaged Edge
Starting on fine grit when the blade has real damage (nicks, flat spots, or a rolled edge) means hours of work where minutes would do. Fine grit is for refining an edge, not building one. If your paper test shows the blade catching or tearing rather than cutting, and light stropping doesn't improve it, go back to 400 grit or coarser and rebuild.
Stopping Before the Burr Forms
Stopping short of a full burr means the edge hasn't been completely reformed. You can do 50 strokes and still have a dull blade if the stone never quite reached the cutting edge along its full length. Always verify the burr by feel before moving to fine grit. No burr means keep going, not move on.
Whetstone vs. Diamond Stone vs. Arkansas Stone for Garden Shears
The stone you pick affects how fast the work goes, how flat the sharpening surface stays, and how much you spend upfront vs. over time. None of the three is universally best. Each suits a different type of user.
| Stone Type | Speed | Stays Flat | Ideal User | Upfront Cost |
|---|---|---|---|---|
| Combination whetstone | Medium | Dishes over time | Casual home gardener | £8 to £20 |
| Diamond stone | Fast | Yes, indefinitely | Regular sharpeners, heavy use | £20 to £60 |
| Arkansas (oil stone) | Slow | Yes | Detail-focused, fine finishing | £15 to £40 |
The whetstone wins on price and availability. It handles the full job from coarse to fine with one tool. The trade-off is that it dishes with repeated use and needs periodic flattening to stay effective.
The diamond stone costs more upfront but stays flat permanently and cuts faster. For anyone sharpening multiple tools across a full season, the time saving is real. Aggregate reviews from verified buyers consistently mention the diamond stone paying for itself within one or two seasons compared to professional sharpening costs.
The Arkansas stone is a specialist's choice. It's hard, long-lasting, and produces a very fine edge, but it's slow and less suited to coarse repair work. Most gardeners who own one use it for finishing after coarse work done on a different stone.
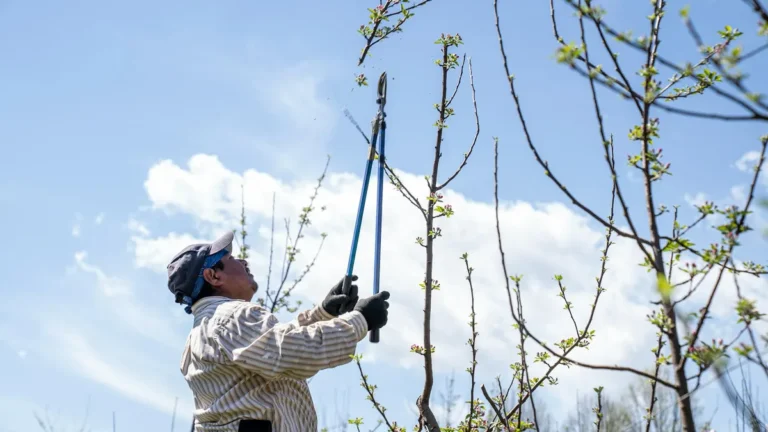
How Often Should You Sharpen Garden Shears?
Two to four times per active growing season covers most regular home garden use. That's a rough guide, not a strict rule. What actually determines frequency is what you're cutting, how much of it you cut, and whether you're maintaining the edge consistently or waiting until the blade is completely gone.
A few practical markers tell you it's time to sharpen before the blade is obviously dull:
- Cuts that used to take one squeeze now need two
- Stems show a crushed or fibrous cut face rather than a clean one
- You're repositioning the blade mid-cut more than once
- The blades feel sticky or gummy on contact (partly a cleaning issue, but worth checking edge quality too)
Hedge shears used for extended trimming sessions dull faster than bypass pruners used for precise cuts. If you're shaping a large hedge in one go, a quick touch-up with a fine stone midway through the session keeps the edge working properly without a full sharpening session.
Professional groundskeepers and horticulturists typically sharpen more frequently, sometimes weekly during peak season, using a few light strokes on a fine stone rather than full sessions. That kind of light, regular maintenance is far less work than rehabilitating a fully dull blade once a season.
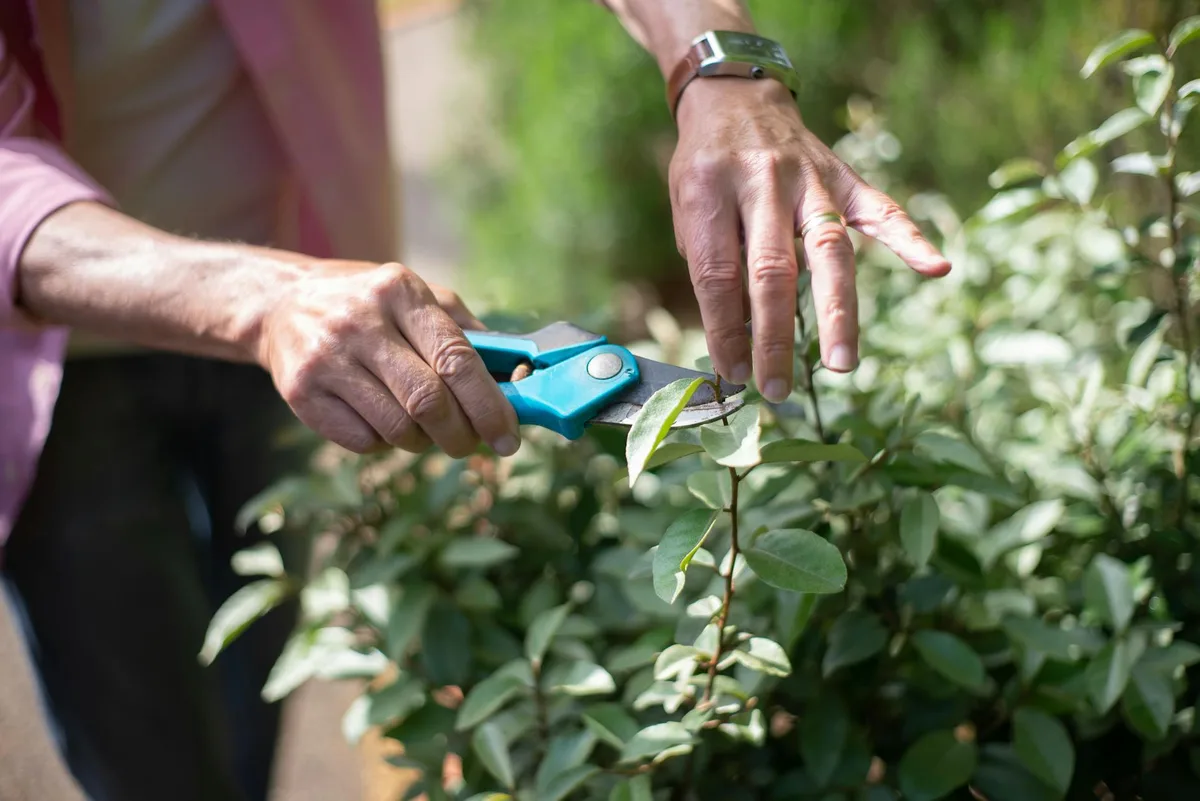
Keeping Your Shears Sharp for Longer (Between Sessions)
Regular maintenance between sharpening sessions extends edge life significantly and reduces the work needed each time you do sharpen. None of it takes more than a few minutes.
Clean blades after every use. Sap is the main enemy. It builds up on the blade faces, attracts grit and soil particles, and creates a mildly abrasive layer that wears the edge faster than normal cutting would. A quick wipe with a turpentine-soaked rag after each session takes thirty seconds and makes a real difference over a full season.
Oil regularly. A light coat of camellia oil or 3-in-1 oil on the blade faces after cleaning keeps surface rust from forming and reduces friction during cuts. Friction accelerates edge wear. It also reduces the hand effort needed per cut, which matters on long hedge-trimming sessions.
Check the pivot tension periodically. A loose pivot allows the blades to flex sideways under load, which causes the cutting edge to rub against the flat back of the opposing blade rather than passing cleanly beside it. That sideways contact grinds the edge down faster than the actual cutting does. A quick snug with a spanner every few weeks during heavy use keeps the geometry correct.
Store dry and covered. Leaving shears outdoors or in a damp shed accelerates oxidation even on high-carbon steel blades. A dry storage location, ideally with the blades lightly oiled, is all that's needed. Blade sheaths (often sold separately by manufacturers like Felco and ARS) are worth having if your shears live in a tool bucket with other implements.
Safety: How to Handle a Blade During Sharpening Without Getting Cut
A freshly sharpened garden shear blade is genuinely sharp. That sounds obvious, but it's easy to forget mid-session when you're focused on angle and stroke count.
The single most important precaution is a cut-resistant glove on the hand that holds or stabilises the blade. Standard gardening gloves offer almost no cut protection. Look for gloves rated to EN 388 (the European standard for mechanical risk protection) with a cut resistance level of at least 3 or higher. Nitrile-coated palm gloves that meet this rating are widely available for under £15.
Never run a bare fingertip along the cutting edge to test sharpness. Always use the cross-stroke burr check described earlier (dragging the pad of your finger across the flat back, not along the edge). It tells you everything the edge-stroke test would, without the risk.
A few other practical precautions worth following:
- Secure the blade in a vice or clamp where possible, rather than holding it freehand throughout the session
- Keep the sharpening stroke moving away from your body, not toward it
- Set the shears down on a stable surface with the blades closed when you're not actively working on them
- Dispose of any metal filings (swarf) from the sharpening session carefully. Don't brush them into garden soil with bare hands, and don't rinse them down a drain near planted areas
If you're using a rust-removing chemical product during prep, work in a ventilated space and wear nitrile gloves. Most rust removers contain phosphoric or oxalic acid at concentrations that cause skin irritation with repeated contact.
FAQs
Can you sharpen garden shears without taking them apart?
Yes, in most cases you can. If the blades open wide enough to lay the stone flat against the bevel without the second blade obstructing the angle, there's no need to disassemble. Disassembly is only necessary when the blades are too close together for clean access, or when the pivot is loose enough to let the blades shift during sharpening.
How do you know which side of the blade to sharpen on bypass shears?
The beveled face is the side to sharpen. Hold the blade up to a light source at eye level and tilt it slowly. The beveled face has a visible angled grind running to the cutting edge. The opposite face is completely flat.
Only the beveled face gets sharpening strokes. The flat back gets two or three light deburring passes at the end, held perfectly flat against the stone.
What happens if you sharpen both sides of a bypass shear blade?
Sharpening both sides of a bypass blade creates a symmetrical double edge, which sounds beneficial but isn't. Bypass shears are designed so the flat back of the cutting blade slides against the flat inner face of the opposing blade during a cut. A double edge on the cutting blade disrupts that geometry, causing the blade to deflect sideways and crush stems rather than slice them cleanly.
How long does sharpening garden shears take?
A regularly maintained blade takes five to fifteen minutes from start to finish, including prep and oiling. A neglected blade with real damage (heavy rust, nicks, or a completely rolled edge) can take twenty to forty minutes, mostly because coarse grit work to rebuild the edge takes time. The more consistently you sharpen, the less time each session requires.
Can you use a knife sharpener on garden shears?
Pull-through knife sharpeners aren't suitable for garden shears. They're designed for symmetrical double-bevel kitchen knife edges and apply a fixed angle that doesn't match the single-bevel geometry of bypass shears. A flat whetstone or diamond stone held at the correct bevel angle gives you control over the process that no pull-through device can replicate on a curved garden blade.
Do stainless steel blades sharpen differently from high-carbon steel blades?
Stainless steel is harder to sharpen than high-carbon steel and takes longer to raise a burr. It holds a reasonable edge but doesn't get as keen as high-carbon steel at its best. Manufacturer specs for premium shears (Felco, ARS, Bahco) typically use high-carbon or chrome-vanadium steel for the cutting blade precisely because it sharpens more readily and holds a finer edge. The sharpening technique is identical for both, but stainless blades need more strokes at the coarse grit stage before the burr forms.
Is it worth sharpening old or cheap garden shears?
Generally yes, if the blade isn't cracked, bent at the pivot, or so badly pitted from rust that the steel surface is structurally compromised. Even inexpensive shears cut well when sharp. The cost of a combination whetstone is less than most replacement shears, so sharpening almost always makes financial sense. The exception is a blade where the bevel geometry has been ground away by repeated incorrect sharpening over many years, leaving too thin a blade to hold an edge reliably.