How to Sharpen Garden Tools at Home
Knowing how to sharpen garden tools at home is one of those skills that pays for itself the first time you use a freshly sharpened spade and it slides through compacted soil like it's brand new. Dull tools don't just make the work harder, they crush and tear plant tissue instead of cutting it cleanly, which leaves wounds that invite disease. Most gardeners replace tools years earlier than they should, simply because nobody showed them how to restore an edge.
A standard 10-inch mill bastard file costs around £8 in the UK or $10 in the US as of 2026, and it's genuinely all you need to refresh most digging tools. The sections below walk through every common garden tool type, the correct angles, the right technique, and the mistakes that ruin otherwise fixable edges.
Why Dull Garden Tools Cost You More Than You Think
A blunt spade doesn't just slow you down. It transfers the extra force required straight into your wrists, shoulders, and lower back over hours of digging. That physical cost is real, but the horticultural cost is equally significant.
When a dull blade hacks through a root or stem rather than slicing it, the torn tissue takes far longer to seal. That open wound is an entry point for fungal infections and bacterial rots. Aggregate horticultural guidance from the RHS confirms that clean pruning cuts heal significantly faster than crushed or ragged ones, which is the direct result of a sharp, well-maintained blade.
The financial side is straightforward too. A quality spade with an ash handle, properly maintained, can outlast the person who bought it. Replacing tools because the edges were never touched is simply throwing money away when a file and ten minutes of work would have kept them going for another decade.
What You Actually Need to Sharpen Garden Tools at Home
You don't need a workshop full of specialist gear. The honest list is short, and most of it is cheap.
Sharpening Tools and Abrasives: What to Buy and What to Skip
For digging tools like spades, hoes, and forks, a 10-inch flat mill bastard file is the right starting point. "Bastard cut" refers to the coarseness of the file's teeth, it's aggressive enough to remove metal efficiently but won't destroy an edge in one pass.
For pruning shears, secateurs, and loppers, a diamond file or a small diamond whetstone gives you more precise control on a narrow bevel. Diamond abrasives cut faster than aluminium oxide stones, last longer, and don't need oil to work properly.
Here's a simple breakdown of what's worth buying versus what you can skip:
| Tool | Best For | Worth Buying? |
|---|---|---|
| 10-inch mill bastard file | Spades, hoes, shovels, trowels | Yes, essential |
| Diamond file (fine grit) | Secateurs, loppers, hedge shears | Yes, very useful |
| Combination whetstone (coarse/fine) | Pruning tools, finishing edges | Yes, good long-term investment |
| Bench grinder | Heavy restoration of deeply damaged tools | Only if you do this regularly |
| Pull-through sharpener | Most garden tools | No, doesn't maintain correct bevel |
| Leather strop | Final polishing of pruner blades | Optional but excellent |
A wire brush and some light machine oil (WD-40 works fine here) round out the kit. You need to clean rust and debris off a blade before you sharpen it, not after.
Setting Up a Safe, Stable Workspace
A tool that's moving while you file it is a tool that's going to produce an uneven, useless edge, and likely cut your hand in the process.
Clamp long-handled tools horizontally in a bench vice if you have one. If not, brace the handle against a solid surface and use your non-dominant hand to stabilise the blade, keeping fingers well back from the edge. For smaller tools like secateurs, disassemble them before sharpening. Never try to sharpen a bypass pruner while it's assembled.
How to Read Your Tools Before You Start Sharpening
Before you pick up a file, spend sixty seconds actually looking at what you're working with. This saves you from sharpening the wrong face, filing at the wrong angle, or wasting time on a tool that needs replacing rather than sharpening.
Spotting Dull Edges, Rust Pitting, and Damaged Bevels
Hold the blade up to a light source at a low angle. A sharp edge catches almost no light because it has no surface area. A dull edge reflects light clearly as a thin bright line along the cutting edge, that's the flat, blunted area where the bevel has worn away.
Rust pitting is a different problem. Surface rust, the reddish-brown coating that comes from leaving tools damp, brushes off with steel wool and doesn't affect the blade's function once removed. Deep pitting, where the rust has eaten actual craters into the metal, weakens the structure of the edge and won't file out cleanly. Tools with severe pitting along the bevel may produce an edge that chips immediately under use.
Check also for:
- Visible nicks or notches in the cutting edge (from hitting stones or roots)
- An uneven bevel, where previous sharpening has created a curved or wavy face
- Cracks near the blade's heel or around rivet holes, which indicate metal fatigue
When a Tool Is Worth Sharpening vs. Worth Replacing
If the blade is sound and the damage is surface-level, sharpen it. If you're looking at a cracked blade, deep pitting across the entire bevel, or a hollow-ground edge that's been ground so thin the metal flexes under finger pressure, it's time to replace.
A useful rule: if the steel is discoloured blue or purple along the edge, the temper has already been destroyed by heat (usually from a previous grinder session with no cooling). That steel won't hold an edge no matter how carefully you sharpen it.
The Right Bevel Angle for Every Garden Tool
Getting the angle right is the single most important part of sharpening. Too steep and the edge is blunt before you've started. Too shallow and it'll roll or chip the first time it hits the ground.
The good news is you don't need to measure precisely with a protractor. You're matching the existing factory bevel angle that's already on the tool. Look at the blade side-on and you'll see the angled face. Your file needs to sit flush against that face as you work.
Here are the standard bevel angles for the tools you're most likely to sharpen:
| Tool | Bevel Angle | Notes |
|---|---|---|
| Spade / shovel | 40–45° | Top (upper) face only |
| Draw hoe / Dutch hoe | 25–45° | Top face, follow existing bevel |
| Trowel | ~45° | Top face only |
| Pruning shears / secateurs | 20–25° | Bevelled blade only, follow factory angle |
| Loppers | 20–25° | Same as secateurs, scaled up |
| Hedge shears | 20–30° | Each blade individually |
| Lawn edger | 45° | Top face, similar to spade |
If a tool has been sharpened badly before and the bevel looks inconsistent, start at what feels like the natural angle of the blade and work consistently from there. After several sharpening sessions, the correct bevel re-establishes itself.
How to Sharpen Spades, Shovels, and Hoes
These are the workhorses of any garden, and they're also the easiest tools to sharpen. A decent refresh takes less than ten minutes once you know what you're doing.

Step-by-Step: Filing the Bevel Face Correctly
1. Clean the blade first. Wire-brush off any dried soil or surface rust. If there's heavier rust, a quick pass with coarse steel wool or wet-and-dry sandpaper (around 80 grit) clears it without damaging the steel.
2. Secure the tool. Either clamp it horizontally in a vice or brace the handle firmly against a solid surface with the blade face-up and accessible.
3. Position your file. Place the flat face of your mill bastard file against the bevelled face of the blade. You're working on the upper (top) face only, the underside of a spade blade is flat and should stay flat.
4. File in one direction only. Push the file forward across the blade in smooth, even strokes. Lift it on the return stroke. Don't saw back and forth, filing in both directions produces a rougher edge and clogs the file faster.
5. Work across the full width. Move from one side of the blade to the other in overlapping passes, keeping the angle consistent throughout. Aim for around 15 to 20 strokes for a tool that's just lost its edge, more if it's been neglected for seasons.
6. Keep checking your angle. Every few strokes, stop and look at the bevel face side-on. It should look uniformly matte and scratched across its full width. Shiny patches mean the file isn't reaching those spots.
How to Check for a Burr and Remove It Properly
A burr is a thin, rough lip of metal that forms on the opposite face of the blade as you file. It's actually a good sign, it means you've pushed the metal far enough to create a new edge. You can feel it by dragging your thumb (carefully, perpendicular to the edge, never along it) across the flat underside of the blade.
Once you feel the burr running consistently along the full length of the blade, you've sharpened enough. Now remove it.
Turn the tool over and lay the file completely flat against the underside of the blade. One or two very light strokes is all it takes. You're not sharpening here, you're just knocking off that thin metal lip. Finish with a wipe down, a thin coat of machine oil to prevent rust, and the tool is done.
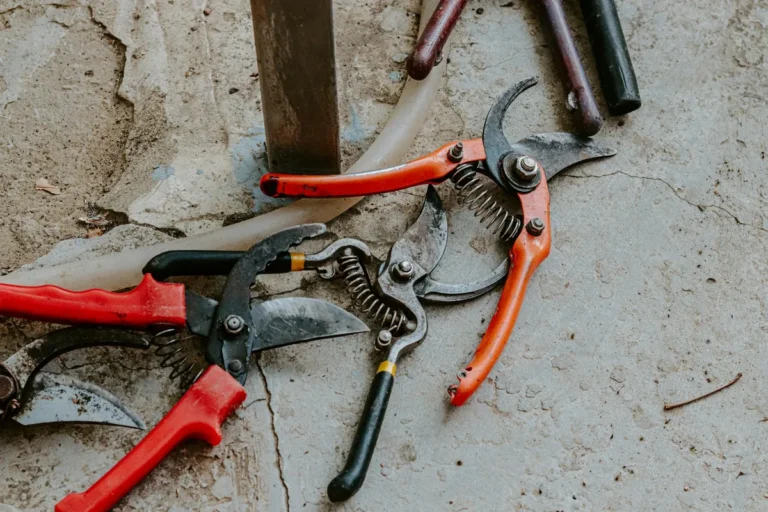
How to Sharpen Pruning Shears and Secateurs
Secateurs are the tool most gardeners use most often, and they're also the one most commonly sharpened incorrectly. The mistake is almost always the same: sharpening both blades when only one should ever be touched.

Disassembly, Blade Identification, and the One Face You Never Touch
Bypass pruners (the most common type, where two blades cross like scissors) have one bevelled cutting blade and one flat counter-blade. The cutting blade has an angled face on one side and a completely flat face on the other. The counter-blade is flat on both sides and acts as a guide, not a cutter.
Sharpen only the bevelled face of the cutting blade. The flat back of that blade gets one or two very light passes to remove the burr, nothing more. The counter-blade gets nothing at all. If you bevel both blades, the cutting action collapses and the pruner will crush stems rather than slice them.
Before sharpening, remove the pivot bolt and separate the blades. This gives you full control and stops you accidentally filing the wrong face. Wipe both blades clean with a rag, and use steel wool to lift any surface rust before you start.
Step-by-Step: Diamond File and Whetstone Method
1. Identify the factory bevel. Look at the cutting blade side-on. You'll see a small, angled face running along the cutting edge, typically between 20 and 25 degrees. That's your guide angle.
2. Place the diamond file against the bevel. Hold the blade steady (cloth over your fingers if the edge is already sharp) and lay the file flat against the bevelled face. A small diamond paddle file works well here, as does a fine-grit diamond whetstone.
3. Stroke forward along the bevel. Push the file from the base of the blade toward the tip in a smooth arc that follows the curve of the blade. Lift on the return. Keep the file flush against the bevel throughout.
4. Use light, consistent pressure. You're refining an edge, not grinding a new one. Ten to fifteen strokes is usually enough for a blade that's been used regularly but maintained. A badly neglected blade might need thirty or more before you feel a burr forming on the flat side.
5. Check for the burr. Run your thumb across the flat back of the cutting blade (perpendicular to the edge). When you feel a consistent rough lip along the full length, stop filing the bevel.
6. Remove the burr. Lay the flat back of the blade against the fine side of your whetstone and make one or two flat strokes. Keep the blade absolutely flat against the stone, don't tilt it or you'll inadvertently create a back-bevel that ruins the cutting geometry.
Reassembly, Gap Check, and Pivot Oiling
Reassemble the pruner and hold it up to the light before you close the blades. With bypass pruners, there should be a very slight gap between the blades when you look at them from the tip, they shouldn't press flat against each other along their full length. If the blades are pressing hard together and binding, the pivot bolt is too tight. Back it off slightly.
Apply a small drop of light machine oil to the pivot point and open and close the pruner several times to work it in. Then do a test cut on a piece of paper. A sharp, properly assembled bypass pruner slices through cleanly with almost no resistance.
How to Sharpen Loppers and Hedge Shears
Loppers follow exactly the same logic as secateurs, just at a larger scale. Bypass loppers have one bevelled cutting blade and one flat counter-blade, and the same rule applies: bevel face only on the cutting blade, a single deburring pass on the flat back, nothing on the counter-blade.
Because lopper blades are longer and often thicker, a small diamond file can feel slow. A medium-grit flat whetstone or a larger diamond paddle gives you more surface contact per stroke and speeds up the process. The angle is the same, around 20 to 25 degrees, following the factory bevel.
Hedge shears are slightly different because both blades are bevelled and both get sharpened. Lay the shears flat on a stable surface, unfolded. File each blade's bevelled face individually with a flat file or whetstone, maintaining the original angle. Then flip each blade and do one light deburring pass on the flat inner face.
Keep the shears disassembled if your model allows it, it's much easier to maintain a consistent angle when you're working on one blade at a time.
How to Sharpen Trowels, Mattocks, and Edgers
These tools get overlooked, but a sharp trowel cuts through compacted soil and root mats noticeably faster than a blunt one. The bevel on a trowel sits at roughly 45 degrees on the top face only, similar to a spade. Use a mill bastard file with the same push-stroke technique described earlier.
Mattocks and pickaxes have two working edges: the broad chopping blade and the narrow pick. The chopping blade sharpens exactly like a hoe, with the file working on the top bevelled face. The pick needs a round or tapered file to maintain its pointed profile, working the metal down toward the tip from both faces symmetrically.
Lawn edgers often have a single bevelled face on the lower edge, angled at around 45 degrees. These see a lot of soil contact and dull quickly on stony ground. A mill bastard file works well, and because the blade is usually accessible without disassembly, it's one of the faster tools to refresh. Five minutes of filing at the start of the season makes a visible difference.
Hand Filing vs. Bench Grinder vs. Diamond File: Which Method to Use
The right sharpening method depends on the tool's condition, the steel type, and how much metal needs removing. There's no single best option across all situations.
| Method | Best For | Speed | Risk Level | Cost |
|---|---|---|---|---|
| Mill bastard file | Spades, hoes, trowels, regular maintenance | Moderate | Low | £5–£12 |
| Diamond file / whetstone | Secateurs, loppers, hedge shears, fine finishing | Slower | Low | £10–£30 |
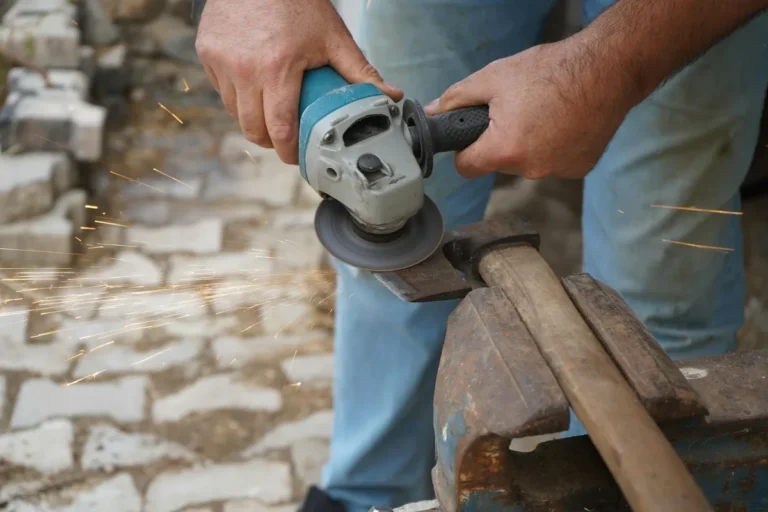
| Bench grinder | Heavy restoration, deep nicks, thick blades | Fast | High (heat) | £40–£80 |
| Angle grinder with flap disc | Very heavy restoration only | Very fast | Very high | Varies |
| Pull-through sharpener | Nothing in this list | Fast | Medium | £8–£20 |
The bench grinder case deserves more explanation. Grinders remove metal quickly, which sounds like an advantage until you overheat the blade. Steel that turns blue or purple at the edge has lost its temper, the heat treatment that gives it hardness. That edge will never hold well again, regardless of how sharp you grind it.
If you do use a bench grinder for heavy restoration work, keep a bucket of cold water beside it and dip the blade every few seconds. You're aiming to keep the steel cool enough that you can touch it comfortably. The moment it gets too hot to hold near (not touch), you're already pushing into dangerous territory for the temper.
Pull-through sharpeners aren't worth buying for garden tools. They remove metal at a fixed angle that rarely matches the existing bevel, they produce a weak, over-thinned edge, and they can't handle the width of a spade or hoe blade at all. For secateurs specifically, they often file into the flat back of the blade, which ruins the bypass cutting geometry.
For most home gardeners maintaining tools regularly, a 10-inch mill bastard file and a diamond whetstone cover everything on the list. That's a total outlay of around £20 to £35, and both last for years with basic care.
Mistakes That Ruin Good Tools (and How to Avoid Them)
Most sharpening damage is permanent. Understanding what goes wrong makes it easy to avoid.
Filing the wrong face on secateurs. This is the most common error in aggregate, and it's straightforward to fix once you know the rule: bevel face gets filed, flat back gets one deburring pass only, counter-blade gets nothing.
Inconsistent angle during filing. If your wrist rocks during each stroke, you're creating a rounded bevel instead of a flat one. A rounded bevel still looks sharpened but produces a weak edge that dulls faster. Keep your wrist locked and your elbow doing the movement.
Over-grinding with a bench grinder. Removing too much metal thins the blade to a point where it chips or flexes under load. Quality tools have a specific blade geometry that took engineering to produce. Grinding past the original bevel face destroys that geometry and can't be undone.
Skipping burr removal. A burr feels rough under your thumb and looks like a thin, ragged lip of metal on the opposite face from the one you're filing. If you don't remove it, it folds over immediately on first use and the tool feels dull again within minutes. Always check for the burr and always remove it.
Sharpening serrated blades incorrectly. Some loppers and pruners have serrated cutting blades. These don't sharpen the same way as straight-edged blades. Each serration needs a tapered round file worked individually into the gullet of the serration on the bevelled side. It's slow work.
If the serrations are severely worn, replacement is often more practical than restoration.
Not cleaning rust before filing. Filing over rust doesn't remove it, the rust clogs the file's teeth almost immediately and dramatically slows your work. A wire brush or steel wool pass before you start takes sixty seconds and keeps your file cutting cleanly throughout.
Finishing, Oiling, and Storing Tools After Sharpening
Sharpening is only half the job. What you do in the ten minutes after filing determines how long that edge actually lasts before you need to do it again.
Once the burr is removed and the blade feels sharp, wipe it down with a clean rag to clear any metal filings. Those fine particles are abrasive and will scratch the blade surface if left sitting. A quick wipe takes seconds.
Next, apply a thin coat of light machine oil across the entire blade surface. WD-40 works fine for this, though a proper machine oil or even a smear of petroleum jelly gives slightly longer protection in damp storage conditions. You're not lubricating anything here, you're creating a barrier between the steel and moisture.
Wooden handles deserve attention too. Ash handles dry out over time, especially if tools have been left outside, and dry wood cracks and splinters. A generous rub of raw linseed oil worked into the grain every season keeps the wood flexible and tight in the socket. Let it soak in for a few hours before storing.
Where and How to Store Sharpened Tools
Hanging tools off the ground is the single most effective storage habit for preventing rust. When blades rest on a damp floor or lean against a wet wall, moisture sits against the steel continuously. A simple rack of nails or a dedicated tool wall takes an afternoon to set up and genuinely extends tool life by years.
If you're storing tools through winter, a light oil coat before putting them away is more important than at any other time of year. Cold, damp conditions accelerate rust formation significantly, particularly on carbon steel tools.
How Often Should You Actually Sharpen Garden Tools?
The honest answer is: more often than most people do, but less often than they fear. There's no fixed calendar rule that applies to every garden and every tool.
The most reliable signal is feel. If a spade requires noticeably more effort to push into soil than it did recently, the edge has gone. If secateurs are crushing stems rather than slicing them cleanly, they need attention. Don't wait until a tool is visibly blunt, that means it's been working against you for weeks.
As a practical framework, here's how frequency breaks down by tool type and use:
| Tool | Recommended Frequency | Trigger Signs |
|---|---|---|
| Spade / shovel | 2–3 times per season | Increased resistance, visible light reflection on edge |
| Hoe | Every 2–4 weeks during active use | Dragging rather than slicing through soil surface |
| Pruning shears / secateurs | Every 2–4 weeks of regular use | Crushed stems, ragged cuts, blade gap widening |
| Loppers | Monthly during pruning season | Same as secateurs |
| Hedge shears | Start and mid-season | Tearing rather than cutting hedge growth |
| Trowel | Once or twice per season | Noticeable resistance in compacted soil |
Gardeners working on heavy clay soils, which are common across much of the UK Midlands and parts of the US Southeast, will find they need to sharpen digging tools more frequently than those on sandy or loamy ground. Clay is abrasive and dense, and it strips a working edge faster.
Pre-season sharpening in early spring, before the soil work begins, is the habit that makes the biggest cumulative difference. Run through every tool in your kit before the season opens and you'll work more efficiently from the first day out.
Safety Rules You Shouldn't Skip
Sharpening creates newly exposed steel edges, generates fine metal particles, and sometimes involves power tools spinning at high speed. None of it is especially dangerous if you follow a short list of non-negotiable habits.
Secure the tool before you touch the file. A blade that shifts while you're filing can pull your hand across the edge instantly. Use a bench vice whenever possible. If you're bracing by hand, keep all fingers behind the blade, well clear of the cutting edge and the file's path.
Wear cut-resistant gloves when handling sharpened blades. This applies especially to secateur blades during reassembly and when wiping down any freshly sharpened tool. A sharp edge on a pruner doesn't require pressure to cut skin, contact alone is enough.
Use eye protection with any power tool. Bench grinders and angle grinders throw sparks and metal fragments at speed. A fragment hitting an unprotected eye is a serious injury. This isn't optional.
Never grind dry for extended periods. As covered earlier, heat destroys the steel's temper. Beyond the metallurgical damage, a very hot blade touched accidentally causes burns. Keep water close and cool the blade regularly.
Keep the workspace clean and uncluttered. Loose tools on a bench mean something sharp is always within accidental reach. A clean, organised space reduces the chance of grabbing a freshly sharpened blade without thinking.
Additional points worth keeping in mind:
- Keep children away from the workspace entirely during sharpening
- Dispose of worn files and grinding discs in a puncture-resistant container
- Tuck in loose sleeves and remove jewellery before using rotary or bench tools
- Never leave sharpened tools blade-up in a bucket or container where the edge isn't visible
FAQs: Sharpening Garden Tools at Home
Can you sharpen stainless steel garden tools?
Yes, but it's harder and the results are less impressive than with carbon steel. Stainless steel is significantly harder, which means it resists the file more and takes longer to raise a burr. It also doesn't hold a razor edge as well as carbon steel once sharpened. A diamond file works better than a standard mill bastard file on stainless.
The process is the same, but expect to put in more strokes for the same result.
How do you know when a tool is sharp enough?
The paper test is the clearest quick check: hold a piece of newspaper or printer paper upright and draw the blade across it with light downward pressure. A sharp edge slices cleanly with minimal resistance. A blunt edge tears, drags, or skips. For secateurs, a clean slice through a folded piece of paper with no wobbling or crushing tells you the bevel and the bypass geometry are both correct.
Should you sharpen both sides of a hoe blade?
No. A draw hoe and a Dutch hoe are both sharpened on the top (upper) face only, maintaining the existing bevel. The underside remains flat. Filing both sides creates a symmetrical double-bevel that weakens the edge and changes the cutting geometry the tool was designed with.
What do you do if you've ground off the bevel angle by mistake?
If the bevel has been ground away and the blade face is now flat across its width, you need to re-establish the angle from scratch. That means choosing the correct angle for the tool type (refer to the bevel angle table in the earlier section), placing your file at that angle, and filing consistently until a new flat bevel face has formed across the full width of the blade. It takes more strokes than a regular refresh but it's entirely fixable on most tools.
Can old, pitted tools be restored, or are they beyond help?
Surface rust and shallow pitting respond well to coarse wet-and-dry sandpaper (80 to 120 grit) followed by normal filing. Deep pitting along the bevel face itself is trickier. If the pits run through the cutting edge, the edge will chip along those weak points under use. For tools with sentimental or practical value, working through progressively finer grits (80, 120, 240) across the full blade face can remove enough metal to get below the worst pitting.
It's slow work, but older carbon steel tools are often worth the effort given how well they hold an edge once restored.
Is a professional sharpening service worth it?
For a one-off restoration of a large, neglected collection, a professional service makes sense. Most charge between £5 and £15 per tool in the UK and $8 to $20 in the US, depending on tool type and condition. For ongoing maintenance throughout the season, learning to do it yourself with a file and whetstone is faster, cheaper, and gives you more control over the result. A professional can't feel how your specific tools respond the way you can once you've sharpened them a few times.